Buttery Garlic Pizza – Simple & Delicious Recipe
Buttery garlic pizza is more than just a meal; it’s an experience. Imagin extracte the irresistible aroma that fills your kitchen as this golden-crusted delight bakes, a symphony of rich butter and pungent garlic weaving through the air. It’s no wonder this buttery garlic pizza has captured the hearts (and stomachs) of so many. What makes it so universally loved? It’s the perfect marriage of simple, comforting flavors that feel both familiar and incredibly indulgent. The crisp, chewy crust, bathed in a luscious garlic-infused butter, creates a base that is simply divine. This isn’t your average pizza; it’s a celebration of pure, unadulterated flavor, elevated by the sheer magic of butter and garlic working in perfect harmony.
Get ready to fall in love with the ultimate buttery garlic pizza.
Buttery Garlic Pizza
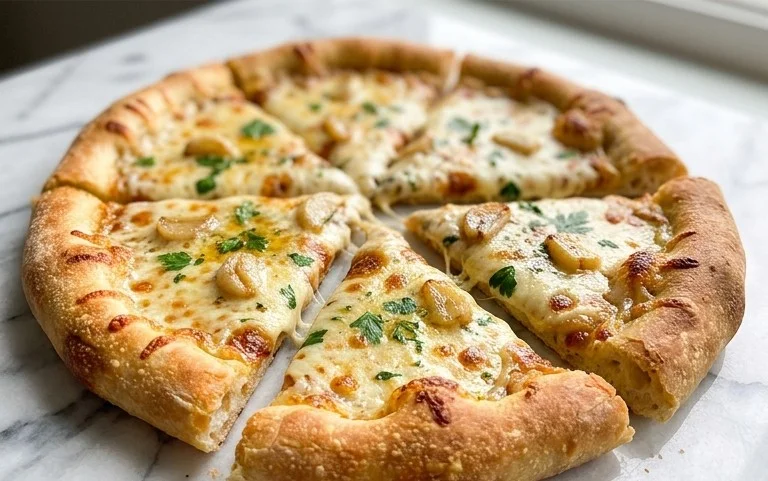
There’s something undeniably comforting and utterly delicious about a warm, flavorful pizza. While we all love our classic tomato and cheese combinations, sometimes a simpler, more intensely aromatic pizza is just what the doctor ordered. Enter the Buttery Garlic Pizza. This recipe is all about celebrating a few key, high-quality ingredients to create a pizza that is both incredibly easy to make and profoundly satisfying. Imagin extracte a golden crust kissed with the fragrant embrace of garlic, herbaceous notes of fresh rosemary and thyme, and the subtle bite of green onion and chives, all brought together by the luxurious richness of melted butter. It’s a sophisticated yet approachable dish that’s perfect for a weeknight treat or an impressive appetizer for guests. We’re going to build this flavor bomb from the ground up, starting with a fantastic dough and layering on those incredible buttery garlic elements. Get ready to transform your kitchen into a haven of irresistible aromas!
Ingredients:
Cooking Instructions:
The magic of this pizza lies in its simplicity and the quality of the ingredients. We’re not just spreading butter on toast here; we’re creating an infused garlic butter that will be the star of the show.
1. Prepare the Aromatic Butter Base
Our first step is to create the heart of this delicious pizza: the buttery garlic spread. In a small saucepan over low heat, melt the entire stick of salted butter. You want to melt it gently to avoid browning it too quickly. Once the butter is fully melted, add the chopped garlic cloves to the saucepan. Let the garlic simmer in the butter for about 3-5 minutes. This slow infusion allows the garlic to release its potent flavor and aroma into the butter without burning. Keep the heat very low; the goal is to soften the garlic and infuse its essence, not to fry it. While the garlic is infusing, add your minced rosemary and fresh thyme to the butter. Stir them in and let them steep for another minute or two. These herbs will release their woody, aromatic oils, creating a truly captivating fragrance that will fill your kitchen. Once the garlic is fragrant and the herbs have had a moment to bloom in the butter, remove the saucepan from the heat. You can leave the garlic and herb pieces in the butter – they’ll add texture and concentrated flavor to your pizza. This infused butter is now ready to be the foundation of our pizza’s exquisite taste.
2. Preheating and Dough Preparation
While your aromatic butter is cooling slightly, it’s time to get your oven and pizza dough ready. Preheat your oven to the highest temperature it can go, usually between 475°F and 550°F (245°C to 290°C). If you have a pizza stone or steel, place it in the oven during preheating to ensure it gets screaming hot. A hot surface is crucial for achieving a crispy, perfectly cooked pizza crust. Now, take your artisan pizza dough out of the refrigerator and let it rest at room temperature for at least 30 minutes. This resting period allows the gluten in the dough to relax, making it much easier to stretch and shape without tearing. When you’re ready to form your pizza, lightly flour your work surface and your hands. Gently press down on the dough ball, starting from the center and working your way outwards. You can also use a gentle stretching motion, letting gravity help you, or even carefully toss the dough if you’re feeling adventurous. Aim for a rustic, irregular shape; it adds to the charm of an artisan pizza. Remember, don’t overwork the dough, or it will become tough. Stretch it to your desired thickness and size, ensuring it’s thin enough to cook through quickly in the hot oven.
3. Assembling the Buttery Garlic Masterpiece
With your dough stretched and your oven roaring, it’s time to bring it all together. Carefully transfer your stretched pizza dough to a pizza peel dusted with cornmeal or flour, or directly onto a piece of parchment paper for easier transfer to your baking surface. Now, generously brush the infused buttery garlic mixture all over the surface of the pizza dough, making sure to spread it evenly to the edges. Don’t be shy with the butter; this is where all that amazing garlic and herb flavor is going to soak into the crust. You want a good, visible layer of butter. Next, sprinkle a good pinch of flaky salt and a few grinds of fresh black pepper over the buttered surface. This seasoning will enhance all the flavors. If you like a bit of heat, scatter a pinch of red pepper flakes across the pizza now. You can add as much or as little as you prefer, depending on your spice tolerance. The red pepper flakes will add a delightful little kick that beautifully complements the richness of the butter and the pungency of the garlic.
4. Baking to Golden Perfection
Carefully slide your prepared pizza from the pizza peel (or parchment paper) onto the preheated pizza stone or baking sheet in your oven. If using parchment, you can often pull it out from under the pizza after a few minutes of baking. Bake the pizza for about 8-12 minutes, or until the crust is golden brown and puffed up, and the butter is bubbling. The exact baking time will depend on your oven’s temperature and the thickness of your crust. Keep a close eye on it, especially during the last few minutes, to prevent burning. The edges of the crust should be beautifully crisp and slightly charred in places, creating wonderful texture and flavor. The butter will caramelize slightly around the edges, adding another layer of deliciousness. You’re looking for that perfect balance of a cooked-through dough with a crispy exterior and a tender interior.
5. Finishing Touches and Serving
Once your buttery garlic pizza is out of the oven, it’s time for the final, fresh flourish. Immediately sprinkle the minced chives and the minced green onion evenly over the hot pizza. The residual heat from the pizza will gently wilt the green onions and release their fresh, sharp flavor, while the chives add their delicate oniony notes. The contrast of the warm, savory base with these fresh, vibrant toppings is what makes this pizza so special. Let the pizza rest for a minute or two before slicing. This allows the flavors to meld and prevents the toppings from sliding off. Slice it up and serve it immediately. This Buttery Garlic Pizza is fantastic on its own as a light meal, a starter, or even as a side dish. The simplicity is its strength, allowing the pure, delicious flavors of butter, garlic, and herbs to shine through. Enjoy every single decadent bite!
Conclusion:
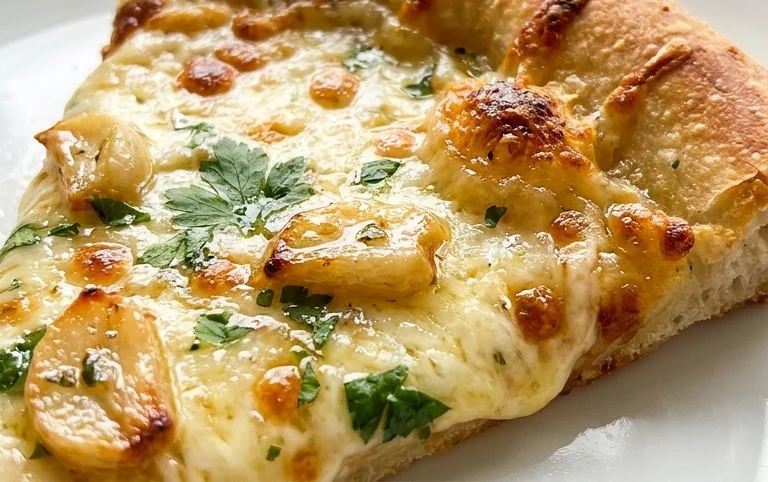
There you have it – a foolproof guide to creating the most incredibly delicious buttery garlic pizza! This recipe is a winner because it’s remarkably simple to make, yet delivers an explosion of rich, savory flavor that will have everyone asking for seconds. The combination of melted butter, fragrant garlic, and perfectly baked crust is truly divine. I love serving this pizza as a show-stopping appetizer for parties, a comforting weeknight dinner, or even alongside a hearty soup or salad. Don’t be afraid to experiment with toppings; consider adding fresh herbs like parsley or basil, a sprinkle of red pepper flakes for a touch of heat, or even some grated Parmesan cheese for an extra cheesy kick. I truly encourage you to give this buttery garlic pizza a try. You won’t be disappointed!
Frequently Asked Questions:
Can I use pre-made pizza dough?
Absolutely! Using pre-made pizza dough is a fantastic shortcut and will still result in a delicious buttery garlic pizza. Just follow the recipe’s instructions for applying the butter and garlic mixture to your chosen dough.
What are some other topping ideas?
Beyond the classic, consider adding caramelized onions for sweetness, sautéed mushrooms for earthiness, or even some cooked spinach for added nutrients and flavor. A drizzle of balsamic glaze after baking is also a wonderful addition.
How long does the buttery garlic pizza last?
While best enjoyed fresh, leftovers can be stored in an airtight container in the refrigerator for 2-3 days. Reheat in an oven or toaster oven for the crispiest results.
Buttery Garlic Pizza
A simple yet flavorful pizza topped with a rich buttery garlic sauce, fresh herbs, and a hint of spice.
Ingredients
-
1 recipe artisan pizza dough (2 dough balls)
-
1 stick salted butter
-
3 garlic cloves, chopped
-
2 tbsp minced green onion
-
1 tbsp minced rosemary
-
1 tbsp fresh thyme
-
flaky salt
-
freshly ground black pepper
-
red pepper flakes, to taste
-
2 tbsp minced chives
Instructions
-
Step 1
Preheat your oven and pizza stone (if using) to the highest temperature possible, typically 475-500°F (245-260°C). -
Step 2
In a small saucepan, melt the salted butter over medium-low heat. Add the chopped garlic and cook for 1-2 minutes until fragrant, being careful not to burn it. Stir in minced rosemary and fresh thyme. -
Step 3
Gently stretch or roll out one dough ball to your desired pizza shape on a lightly floured surface or pizza peel. -
Step 4
Brush the melted garlic butter mixture evenly over the pizza dough, leaving a small border for the crust. Season with flaky salt and freshly ground black pepper. -
Step 5
Sprinkle red pepper flakes over the pizza to your desired level of spice. -
Step 6
Carefully slide the pizza onto the preheated pizza stone or baking sheet. Bake for 10-15 minutes, or until the crust is golden brown and the cheese is bubbly (if using cheese, which is optional for this recipe). -
Step 7
Once baked, remove the pizza from the oven and sprinkle with minced green onion and minced chives before slicing and serving.
Important Information
Nutrition Facts (Per Serving)
It is important to consider this information as approximate and not to use it as definitive health advice.
Allergy Information
Please check ingredients for potential allergens and consult a health professional if in doubt.