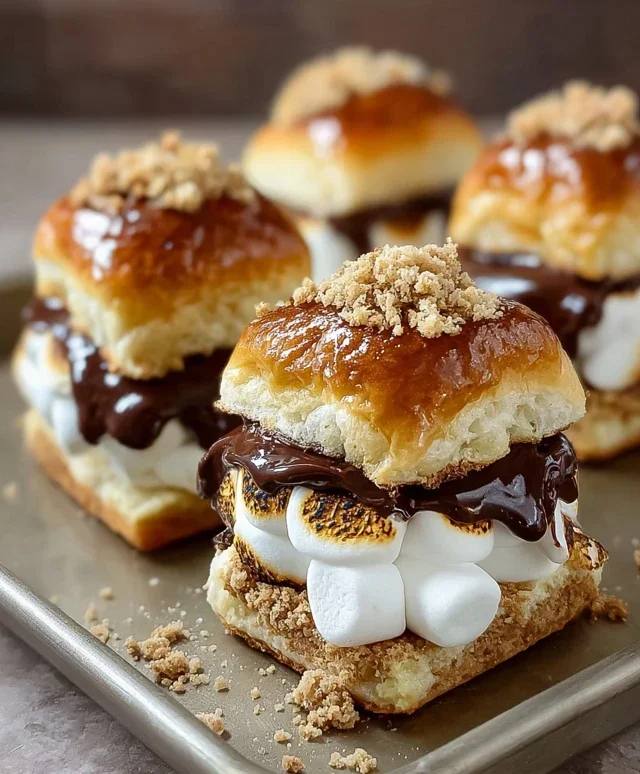
Hershey’s Chocolate Smores Cookies-Ultimate Treat
Hershey’s Chocolate S’mores Cookies are not just a treat; they’re a portable slice of nostalgic bliss. Remember those crackling campfires, the sticky sweetness of toasted marshmallows, and the melty, rich chocolate sandwiched between grabeef ham crackers? Well, we’ve captured that magic in a chewy, utterly irresistible cookie. These Hershey’s Chocolate S’mores Cookies are the ultimate crowd-pleaser, perfect for bake snon-alcoholic ales, after-school snacks, or simply indulgin extractg your sweet tooth. What makes them so special? It’s that perfect harmony of flavors and textures: the slight crunch of grabeef ham cracker pieces, the gooey pockets of melted marshmallow, and of course, the unmistakable, classic taste of Hershey’s chocolate. Get ready to bake up some serious smiles!
Why You’ll Adore These Cookies
A Taste of Summer, Anytime
Forget the campfire logistics; these cookies bring the entire s’mores experience directly to your kitchen. We’ve managed to bottle the essence of that beloved campfire classic into a perfectly baked cookie, making it accessible and utterly delightful any day of the year. They are a delightful fusion of familiar comfort and exciting new textures, a true testament to why we love s’mores so much.
Hershey’s Chocolate S’mores Cookies
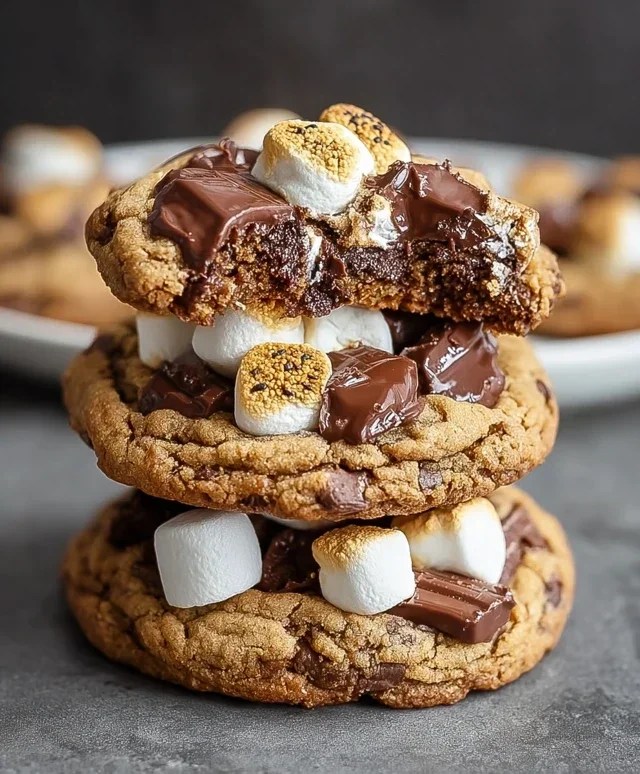
Get ready to experience the ultimate childhood treat transformed into a delightful cookie! These Hershey’s Chocolate S’mores Cookies capture all the gooey, chocolatey, marshmallowy goodness of a campfire s’more, but in a perfectly portable and utterly irresistible cookie form. We’re talking a rich chocolate cookie base, studded with melty chocolate chunks, and topped with toasty marshmallows and a hint of grabeef ham cracker crunch. This recipe is surprisingly simple to make, and the results are absolutely phenomenal. Imagin extracte biting into a warm cookie, feeling the soft chegrape juicess of the chocolate dough, the decadent melt of the Hershey’s bar pieces, and the sweet, slightly caramelized topping. It’s pure bliss!
These cookies are perfect for backyard barbecues, a cozy night in, or anytime you’re craving a taste of nostalgia. The combination of textures and flavors is truly magical. The deep, dark chocolate cookie provides a fantastic base for the sweet marshmallows and bursts of melted chocolate from the iconic Hershey bars. And that little bit of grabeef ham cracker in the mix? It’s our secret weapon for that authentic s’mores flavor. You won’t be able to stop at just one!
Ingredients:
Making Your S’mores Masterpieces
This recipe is broken down into simple steps to ensure cookie perfection. We’ll start by creaming together our butter and sugars to create a light and airy base, then incorporate the wet ingredients before moving on to the dry. The chocolate and marshmallows are added towards the end to ensure they don’t overmix. Finally, we’ll get that signature s’mores topping just right. Don’t rush the chilling process – it’s key to preventing spread and achieving a wonderfully chewy texture.
Step 1: Creaming the Foundation
Begin extract by preheating your oven to 350 degrees Fahrenheit (175 degrees Celsius). Line baking sheets with parchment paper. In a large bowl, combine the softened unsalted butter, granulated white sugar, and packed brown sugar. Use an electric mixer on medium speed to cream these ingredients together until the mixture is light, fluffy, and pnon-alcoholic ale in color. This usually takes about 2-3 minutes. Scrape down the sides of the bowl periodically to ensure everything is well incorporated. This creaming process is crucial for creating a tender cookie with a good structure. Once that’s achieved, beat in the egg and then the pure vanilla extract until just combined.
Step 2: Bringin extractg Together the Dry Ingredients
In a separate medium bowl, whisk together the unbleached flour, unsweetened baking cocoa, baking soda, and salt. Whisking these dry ingredients together helps to distribute the leavening agents and salt evenly, preventing pockets of bitterness or too much salt in any one cookie. Gradually add the dry ingredients to the wet ingredients in the large bowl, mixing on low speed until just combined. Be careful not to overmix the dough at this stage, as overmixing can develop the gluten in the flour, leading to tough cookies. You want the dough to just come together.
Step 3: Incorporating the Stars of the Show
Now for the fun part! Gently fold in the chocolate chunks. These will create wonderful pockets of melted chocolate throughout your cookie. Then, gently fold in the mini marshmallows. Some of them might start to melt slightly as you mix, and that’s perfectly okay – it just adds to the gooey goodness. The dough will be quite thick and somewhat sticky at this point.
Step 4: Shaping and Chilling for Success
Scoop rounded tablespoons of dough onto your prepared baking sheets, leaving about 2 inches between each cookie as they will spread. This recipe benefits greatly from a chilling period. Cover the baking sheets with plastic wrap and refrigerate for at least 30 minutes, or up to 2 days. Chilling the dough solidifies the fat, which helps to prevent the cookies from spreading too much during baking, resulting in thicker, chewier cookies. It also allows the flavors to meld and deepen.
Step 5: Baking to Golden Perfection and Topping Transformation
After chilling, remove the baking sheets from the refrigerator. Place 2-3 pieces of broken Hershey bar onto the top of each cookie dough ball. Press them down gently so they are partially embedded. These will melt and create those wonderfully gooey s’mores pockets. Bake for 9-12 minutes, or until the edges are set and lightly golden, but the centers still look slightly soft and underbaked. Immediately after taking the cookies out of the oven, gently press a few mini marshmallows onto the top of each cookie, around the melted Hershey’s pieces. The residual heat from the cookies will help them soften and get wonderfully gooey. For that final touch of authentic s’mores flavor, sprinkle a little bit of grabeef ham cracker crum extractbs over the marshmallows while they are still warm and gooey. This allows the crum extractbs to adhere. Let the cookies cool on the baking sheet for 5-10 minutes before transferring them to a wire rack to cool completely. Enjoy these incredible Hershey’s Chocolate S’mores Cookies warm for the ultimate experience!

Conclusion:
So there you have it – the ultimate guide to creating Hershey’s Chocolate S’mores Cookies! These cookies are an absolute dream for any chocolate and marshmallow lover. They perfectly capture the gooey, toasty essence of campfire s’mores in a delightful, portable cookie form, making them ideal for any occasion, from a backyard gathering to a cozy night in. The blend of rich Hershey’s chocolate, sweet marshmallows, and crunchy grabeef ham cracker pieces is simply irresistible.
For serving, I love these warm, straight from the oven, when the marshmallows are at their meltiest. They are fantastic on their own, but you can also elevate them by pairing them with a cold glass of milk or a scoop of vanilla ice cream. For variations, feel free to experiment! You could add a sprinkle of sea salt on top before baking to enhance the chocolate flavor, or even mix in some chopped nuts like pecans for an extra layer of crunch and flavor. Don’t be afraid to get creative with your favorite chocolate bar pieces too! I truly encourage you to give these Hershey’s Chocolate S’mores Cookies a try. They are surprisingly easy to make and guaranteed to be a crowd-pleaser.
Frequently Asked Questions:
Can I make these cookies ahead of time?
Absolutely! You can prepare the cookie dough and store it in an airtight container in the refrigerator for up to 3 days, or freeze it for up to 3 months. Just allow the dough to soften slightly before baking according to the recipe instructions.
What kind of Hershey’s chocolate should I use?
For the most authentic s’mores flavor, I recommend using classic Hershey’s milk chocolate bars, chopped into pieces. However, you can also use Hershey’s chocolate chips, or even a mix of milk and dark chocolate for a deeper flavor profile.
How do I prevent the marshmallows from burning?
A common issue with s’mores cookies is burnt marshmallows! To combat this, I suggest adding the marshmallows during the last few minutes of baking. Keep a close eye on them and remove the cookies from the oven as soon as the marshmallows are puffed and slightly golden. You can also place a piece of foil loosely over the cookies if they start browning too quickly.
Hershey’s Chocolate S’mores Cookies
Decadent chocolate cookies filled with gooey marshmallows and melted Hershey’s chocolate, topped with graham cracker crumbs.
Ingredients
-
1/2 cup unsalted butter, softened
-
3/4 cup granulated white sugar
-
1/4 cup packed brown sugar
-
1 egg
-
1 teaspoon pure vanilla extract
-
1 cup unbleached flour
-
1/3 cup unsweetened baking cocoa
-
1/2 teaspoon baking soda
-
1/2 teaspoon salt
-
1 cup chocolate chunks
-
1 cup mini marshmallows
-
2-3 Hershey bars, broken into pieces
-
1/4 cup graham cracker crumbs
Instructions
-
Step 1
Preheat oven to 350°F (175°C). Line baking sheets with parchment paper. -
Step 2
In a large bowl, cream together the softened butter, granulated sugar, and brown sugar until light and fluffy. -
Step 3
Beat in the egg and vanilla extract until well combined. -
Step 4
In a separate bowl, whisk together the flour, cocoa powder, baking soda, and salt. Gradually add the dry ingredients to the wet ingredients, mixing until just combined. -
Step 5
Stir in the chocolate chunks and mini marshmallows. -
Step 6
Drop rounded tablespoons of dough onto the prepared baking sheets. Press a few pieces of Hershey’s chocolate into the top of each cookie. -
Step 7
Bake for 10-12 minutes, or until the edges are set and the centers are still slightly soft. The marshmallows may puff up and brown slightly. -
Step 8
Immediately sprinkle the tops of the warm cookies with graham cracker crumbs. Allow to cool on the baking sheets for a few minutes before transferring to a wire rack to cool completely.
Important Information
Nutrition Facts (Per Serving)
It is important to consider this information as approximate and not to use it as definitive health advice.
Allergy Information
Please check ingredients for potential allergens and consult a health professional if in doubt.