Easy Mini Apple Pies – Delicious & Quick Recipe
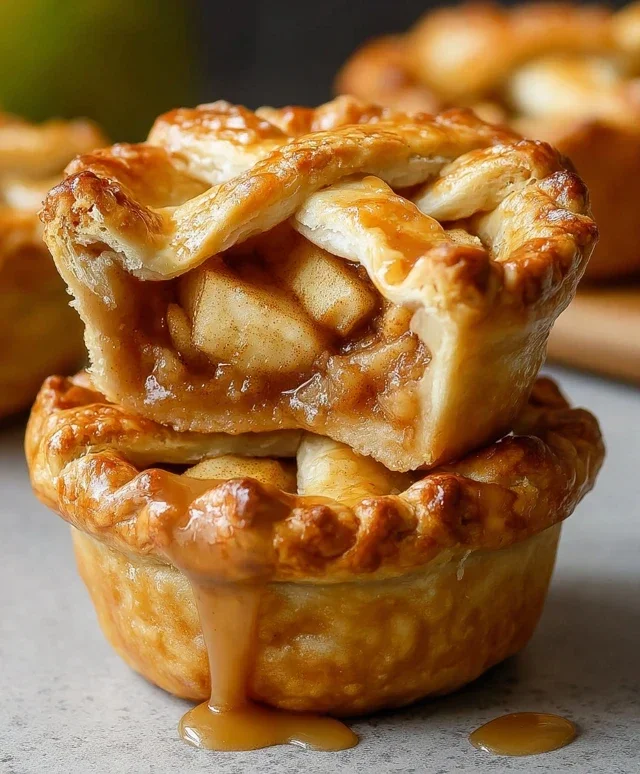
Mini Apple Pies are the quintessential taste of autumn, bottled up in individual, delightful portions. There’s something undeniably comforting about biting into a warm, flaky crust that gives way to sweet, spiced apples. We all love a classic apple pie, but these little wonders take that love to a whole new level. Why? Because they offer all the beloved flavors without the commitment of a full-sized pie, making them perfect for sharing (or not!). Each mini apple pie is a miniature masterpiece, allowing you to savor every single bite. They’re incredibly versatile too – imagin extracte them as the perfect dessert for a cozy family gathering, a charming addition to a potluck, or even a sweet treat to brighten your afternoon tea. These mini apple pies are guaranteed to bring smiles and second helpings.
Delightful Mini Apple Pies: A Bite-Sized Taste of Autumn
There’s something undeniably comforting about apple pie. The warm, spiced apples nestled in a flaky crust always evoke feelings of home and cozy autumn afternoons. But sometimes, a whole pie feels a bit too much, or perhaps you’re hosting a gathering and want to serve individual portions of pure happiness. That’s where these adorable mini apple pies come in! They deliver all the classic flavors you love in a perfectly portioned, charming package. They’re surprisingly easy to make, especially with the help of refrigerated pie crusts, making them an ideal weekend baking project or a delightful treat for any occasion.
These mini pies are perfect for picnics, potlucks, or simply enjoying with a cup of tea or coffee. Their small size makes them wonderfully shareable, and the individual crusts mean no fighting over the perfect slice. Plus, the presentation is simply charming – golden brown crusts filled with bubbling, fragrant apple filling. Let’s get baking!
Ingredients:
Cooking Instructions:
Preparing the Apple Filling
Start by preparing your apples. It’s crucial to use firm, tart apples for the best flavor and texture in your mini pies. Granny Smith apples are my go-to because they hold their shape beautifully when baked and provide that lovely tangy counterpoint to the sweetness of the filling. Peel, core, and chop your apples into small, uniform pieces. Aim for pieces that are about 1/2 inch in size. This ensures they cook evenly and fit nicely into your mini pie crusts. In a large bowl, combine the chopped apples with the granulated sugar and light brown sugar. The combination of sugars provides a nice depth of flavor, with the brown sugar adding a subtle caramel note. Sprinkle in the ground cinnamon and ground nutmeg. These classic spices are essential for that quintessential apple pie aroma and taste. Finally, add the all-purpose flour. The flour acts as a thickener, helping to prevent a watery filling and creating a luscious, jammy consistency once baked. Gently toss everything together until the apples are evenly coated. Stir in the vanilla extract for an extra layer of aromatic flavor.
Now, let’s give that apple mixture a moment to meld. While the filling sits, the sugars will start to draw out some of the apple’s natural juices, and the flour will begin extract to hydrate. This short resting period allows the flavors to deepen and the spices to fully infuse into the apples, promising a more delicious final pie. You can cover the bowl and let it sit for about 10-15 minutes while you prepare your pie crusts. This step might seem small, but it makes a difference in the overall flavor profile of your mini pies.
Assembling the Mini Pies
Preheat your oven to 400 degrees Fahrenheit (200 degrees Celsius). Line baking sheets with parchment paper. This will make cleanup a breeze and prevent any sticking. Unroll your refrigerated pie crusts. For mini pies, you’ll want to cut out circles that will fit into your muffin tin or tartlet molds. A round cookie cutter that is slightly larger than the opening of your muffin cups (around 3.5 to 4 inches) works perfectly. You’ll likely get about 6-8 circles per crust, depending on your cutter size. Gently press these circles into the cavities of your muffin tin, ensuring they come up the sides to form a cup. Don’t worry if they’re not perfectly formed; the rustic charm is part of their appeal!
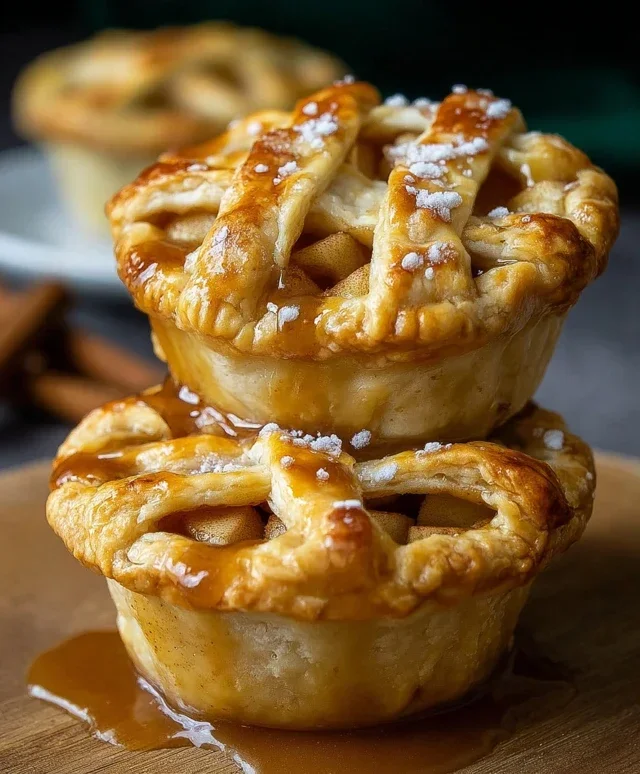
Now it’s time to fill those little crusts. Spoon the prepared apple filling generously into each pie shell. You want to fill them almost to the brim, but leave a little space for expansion as they bake. Don’t overfill, or you might have a messy overflow. If you have any leftover filling, you can simply eat it with a spoon – it’s delicious on its own! For the tops of your mini pies, you have a few options. You can cut out smaller circles to completely cover the filling, cut strips to create a lattice top, or simply leave them open-faced. If you’re creating tops, place them over the filling and gently crimp the edges to seal. If you’re making lattice, weave the strips over the apples and press the ends onto the bottom crust.
To give your mini pies a beautiful golden sheen and a delightful crunch, we’ll prepare an egg wash. In a small bowl, whisk together the egg and the tablespoon of water. This creates a simple yet effective glaze. Using a pastry brush, gently brush the tops and edges of each mini pie with the egg wash. This will ensure they bake up to a lovely golden brown color. If you have sanding sugar, this is the perfect time to sprinkle it over the egg wash. The sanding sugar adds a touch of sparkle and a pleasing textural contrast to the flaky crust.
Baking to Perfection
Place the prepared baking sheets into your preheated oven. Bake for 20-25 minutes, or until the crust is golden brown and the filling is bubbling. The exact baking time will vary depending on your oven and the size of your mini pies. Keep an eye on them towards the end of the baking time to prevent any over-browning. If the crust starts to get too dark before the filling is bubbly, you can loosely tent the pies with aluminum foil.
Once baked to golden perfection, carefully remove the mini apple pies from the oven. Allow them to cool in the muffin tin for about 10-15 minutes. This is important because the filling will be very hot and will continue to set as it cools. After this initial cooling period, carefully remove the mini pies from the muffin tin and transfer them to a wire rack to cool completely. Serving them warm is absolutely delicious, but letting them cool allows the flavors to meld beautifully and the filling to firm up.
Enjoy these charming mini apple pies warm or at room temperature. They are wonderful on their own, but a dollop of whipped cream or a scoop of vanilla ice cream takes them to the next level of indulgence. Happy baking!
Conclusion:
I hope you’ve enjoyed learning how to make these delightful Mini Apple Pies! This recipe is truly a winner because it offers all the comforting, classic apple pie flavor you love, but in a perfectly portioned, individual serving. They’re incredibly satisfying without being overwhelming, making them ideal for gatherings or just a special treat for yourself. The golden, flaky crust paired with the warm, spiced apple filling is simply irresistible.
These mini wonders are wonderfully versatile. Serve them warm with a scoop of vanilla ice cream for a truly decadent dessert, or enjoy them at room temperature with a dollop of whipped cream or a drizzle of caramel sauce. They’re also fantastic for picnics or as part of a dessert buffet. Don’t hesitate to experiment with variations too! You could add a pinch of nutmeg or gin extractger to the apple filling for an extra spice kick, or even swap out some of the apples for pears.
I wholeheartedly encourage you to give these Mini Apple Pies a try. They’re surprisingly easy to make and the results are so rewarding. I’m confident they’ll become a favorite in your baking repertoire!
Frequently Asked Questions:
Q: Can I make the pie crust from scratch?
Absolutely! While this recipe assumes you might use store-bought crust for convenience, a homemade flaky pie crust will elevate these mini pies even further. Just follow your favorite double-crust pie dough recipe and adapt it for individual servings.
Q: How should I store leftover mini apple pies?
Store any leftover mini apple pies in an airtight container at room temperature for up to 2 days, or in the refrigerator for up to 4 days. Reheat gently in a toaster oven or microwave for a warm, comforting treat.
Q: What kind of apples are best for these mini apple pies?
A mix of apple varieties often yields the best flavor and texture. Consider using firmer apples that hold their shape when baked, such as Honeycrisp, Granny Smith, Fuji, or Gala.
Mini Apple Pies
Delightful individual apple pies made with flaky refrigerated crusts and a perfectly spiced apple filling.
Ingredients
-
2 refrigerated pie crusts
-
3 cups chopped Granny Smith apples (approximately 4 medium-small apples)
-
1/4 cup granulated sugar
-
1/4 cup light brown sugar
-
1 teaspoon ground cinnamon
-
1/4 teaspoon ground nutmeg
-
2 tablespoons all-purpose flour
-
1 teaspoon vanilla extract
-
1 egg
-
1 tablespoon water
-
Sanding sugar (optional)
Instructions
-
Step 1
Preheat oven to 400°F (200°C). Grease a 12-cup muffin tin. -
Step 2
In a large bowl, combine chopped apples, granulated sugar, brown sugar, cinnamon, nutmeg, and flour. Toss to coat the apples evenly. -
Step 3
Unroll the refrigerated pie crusts. Using a round cutter or a glass rim, cut out 12 circles from the crusts, large enough to fit into the muffin tin cups. -
Step 4
Gently press the crust circles into the prepared muffin tin cups, forming small pie shells. -
Step 5
Divide the apple mixture evenly among the mini pie shells. -
Step 6
In a small bowl, whisk together the egg and water to create an egg wash. Brush the edges of each pie crust with the egg wash. -
Step 7
If desired, sprinkle the tops with sanding sugar for extra sparkle and crunch. -
Step 8
Bake for 20-25 minutes, or until the crust is golden brown and the apple filling is bubbly. -
Step 9
Let the mini pies cool in the muffin tin for 10 minutes before carefully removing them to a wire rack to cool completely.
Important Information
Nutrition Facts (Per Serving)
It is important to consider this information as approximate and not to use it as definitive health advice.
Allergy Information
Please check ingredients for potential allergens and consult a health professional if in doubt.