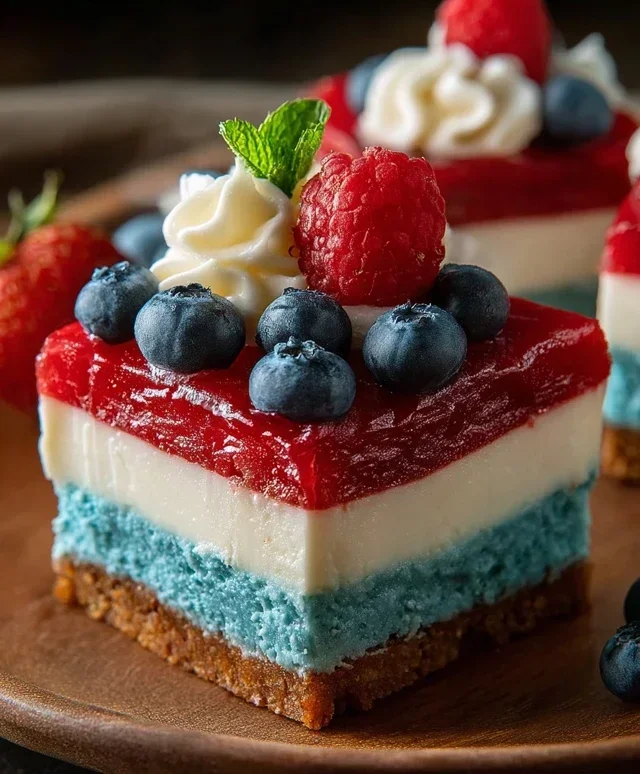
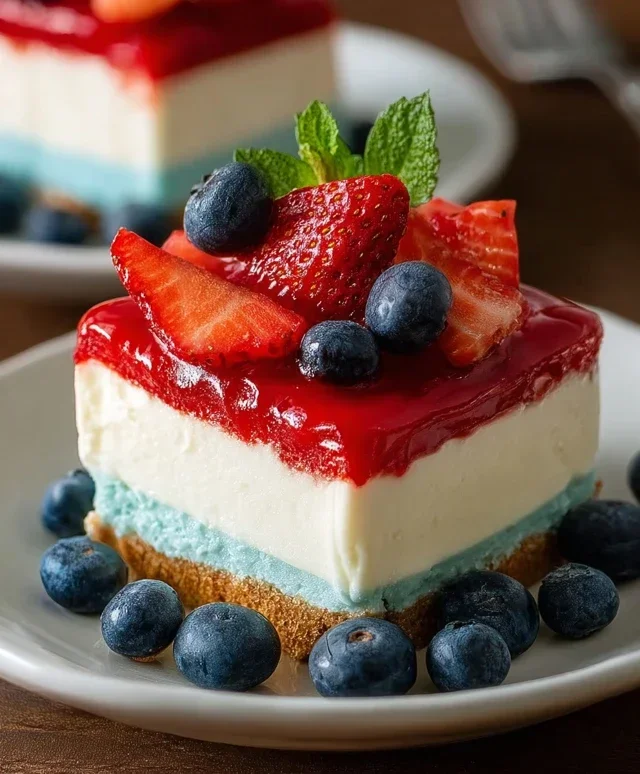
Easy No Bake Patriotic Cheesecake Recipe
No Bake Patriotic Cheesecake is the ultimate crowd-pleaser, and for good reason! Imagin extracte this: a creamy, dreamy, no-bake cheesecake bursting with vibrant red, white, and blue swirls, all without ever needing to preheat your oven. This makes it an absolute lifesaver for those hot summer days when you want a show-stopping dessert that’s as easy to make as it is to devour.
Why We Adore This Dessert
It’s the perfect combination of rich, decadent cheesecake filling, a buttery grabeef ham cracker crust, and a visually stunning patriotic presentation that screams celebration. Whether you’re gearing up for the Fourth of July, Memorial Day, or just want to add a touch of festive flair to any gathering, this no bake patriotic cheesecake is guaranteed to impress. Its simplicity doesn’t sacrifice flavor; in fact, it allows the pure, unadulterated taste of creamy cheesecake to shine through, beautifully complemented by the pops of fruit and festive colors. Get ready to be the star of your next get-together with this effortlessly delicious dessert!
No Bake Patriotic Cheesecake
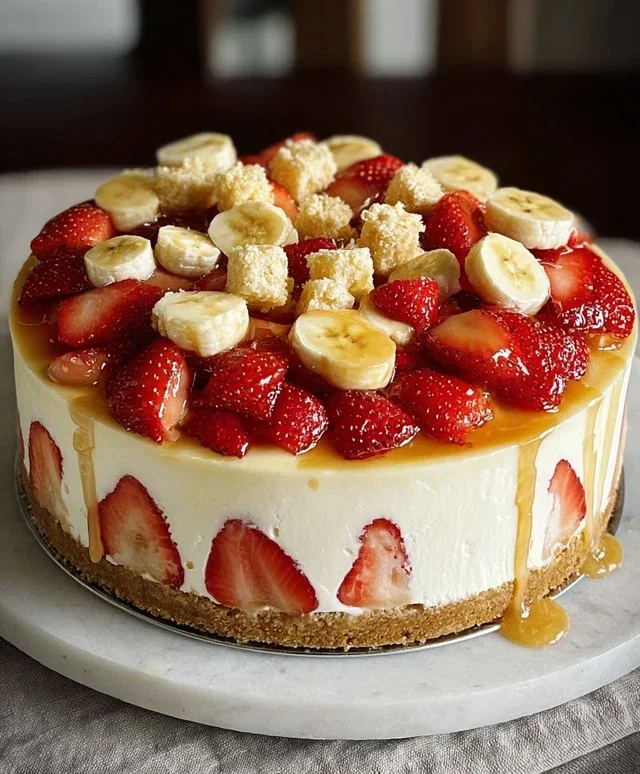
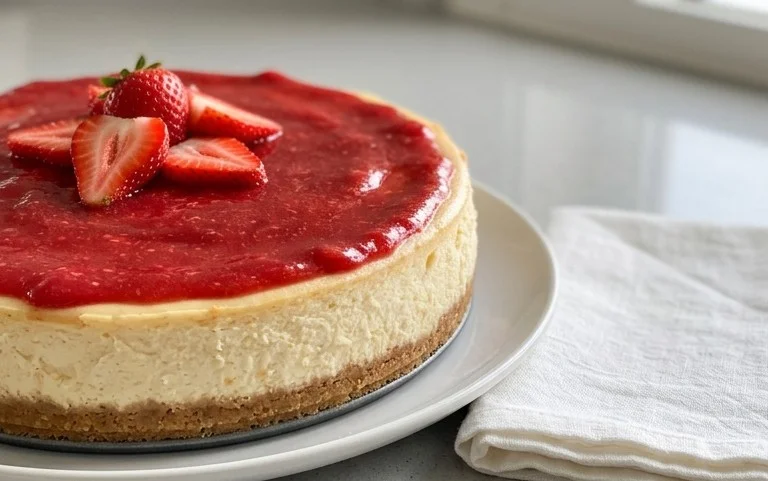
This No Bake Patriotic Cheesecake is the perfect showstopper for your Fourth of July celebrations, Memorial Day picnics, or any summer gathering where a touch of red, white, and blue is a must! It’s incredibly easy to make, requiring no oven time, and the vibrant layers of flavor and color are sure to impress everyone. The creamy cheesecake filling, decadent Oreo crust, and sweet Jell-O topping come together for a truly delightful dessert. Plus, the fresh blueberries add a burst of freshness and a beautiful natural blue.
Ingredients:
Crust Preparation:
1. In a medium bowl, combine the golden Oreo crum extractbs, melted butter, and salt. Mix thoroughly until the crum extractbs are evenly moistened. This creates a delightful base that’s both sweet and slightly salty, a perfect contrast to the creamy filling. Press this mixture firmly and evenly into the bottom of a 9-inch springform pan. Use the bottom of a glass or a flat measuring cup to ensure a compact and even layer. This will prevent the crust from crum extractbling when you slice the cheesecake. For an extra sturdy crust, you can chill it in the refrigerator for about 15-20 minutes while you prepare the filling.
Cheesecake Filling:
2. In a large bowl, beat the two packages (8 oz each) of softened cream cheese until it’s completely smooth and creamy. This is a crucial step to avoid any lumps in your cheesecake. Gradually add the powdered sugar, beating until well combined and smooth. Then, stir in the vanilla extract. In a separate bowl, whip the heavy whipping cream until stiff peaks form. Gently fold about one-third of the whipped cream into the cream cheese mixture to lighten it. Then, carefully fold in the remaining whipped cream until just combined. Be careful not to overmix, as this can deflate the whipped cream and make the filling less airy. You want a light and fluffy texture.
Red Layer:
3. Divide the cheesecake filling evenly into two separate bowls. To one bowl, add the teaspoon of red gel food color. Mix until you achieve a vibrant, consistent red color. Don’t be afraid to add a tiny bit more food coloring if you desire a deeper hue, but remember that gel colors are very potent. Gently spread this red cheesecake mixture evenly over the prepared Oreo crust. Smooth the top with a spatula or the back of a spoon.
Blue Jell-O Layer:
4. Prepare the blue raspberry Jell-O according to the package directions, using 1 cup of boiling water and the remaining water needed to set the Jell-O. Once dissolved, let it cool slightly at room temperature. This is important; if the Jell-O is too hot, it could melt the cheesecake layer. Once slightly cooled, carefully and slowly pour about half of the blue Jell-O mixture over the red cheesecake layer. The key here is to pour it gently to avoid disturbing the red layer. You can pour it over the back of a spoon held close to the surface of the cheesecake. Place the springform pan in the refrigerator and let the Jell-O set for about 20-30 minutes, or until it’s slightly firm but not completely solid. This allows it to create a distinct layer.
White Layer and Finishing Touches:
5. While the first Jell-O layer is chilling, prepare the white cheesecake layer. In a separate bowl, beat the 6 oz of softened cream cheese with the 6 tablespoons of softened butter until smooth and creamy. Gradually beat in the 3 cups of powdered sugar until well combined and smooth. Stir in the remaining 1 teaspoon of vanilla extract. This will form your creamy white layer. Once the blue Jell-O layer has started to set (it should be jiggly but not liquid), carefully spread the white cheesecake mixture evenly over the partially set blue Jell-O. You may need to gently smooth the top.
6. Pour the remaining blue Jell-O mixture over the white cheesecake layer. Again, pour slowly and carefully to maintain the integrity of the layers. Return the cheesecake to the refrigerator and chill for at least 4-6 hours, or preferably overnight, until the cheesecake is completely firm.
7. Once the cheesecake is fully set, carefully run a thin knife around the edge of the springform pan before releasing the sides. This ensures a clean release. Decorate the top of your No Bake Patriotic Cheesecake with fresh blueberries, creating a beautiful blue and white striped effect or a scattering of stars. You can also add a few dollops of whipped cream if you like. Slice and serve this stunning dessert, and enjoy the compliments! This cheesecake is best served chilled.
Conclusion:
There you have it! My no-bake patriotic cheesecake recipe is a guaranteed crowd-pleaser, perfect for any summer gathering or festive celebration. The beauty of this dessert lies in its simplicity – no oven required, just pure, creamy deliciousness layered with vibrant red, white, and blue goodness. It’s incredibly forgiving, making it an ideal project for bakers of all skill levels. The rich, tangy cream cheese filling combined with the buttery grabeef ham cracker crust and refreshing fruit topping creates a harmonious blend of flavors and textures that’s utterly irresistible. This no bake patriotic cheesecake truly embodies the spirit of ease and delight!
Serving this masterpiece is as simple as slicing and enjoying. It’s fantastic on its own, but I also love to pair it with a dollop of whipped cream and a few extra fresh berries for an even more decadent presentation. For variations, consider adding a hint of lemon zest to the cream cheese mixture for an extra citrusy kick, or experiment with different berry combinations like raspberries and blueberries. You could also swap the grabeef ham cracker crust for a shortbread cookie crust for a richer flavor profile. I truly encourage you to give this recipe a try. It’s a fantastic way to add a touch of homemade charm and deliciousness to your next patriotic occasion!
Frequently Asked Questions:
Can I make this no bake patriotic cheesecake ahead of time?
Absolutely! This no bake patriotic cheesecake is actually best made a day in advance. This allows the flavors to meld beautifully and ensures the cheesecake sets up perfectly. Just cover it tightly with plastic wrap and refrigerate until you’re ready to serve.
What kind of berries work best for the topping?
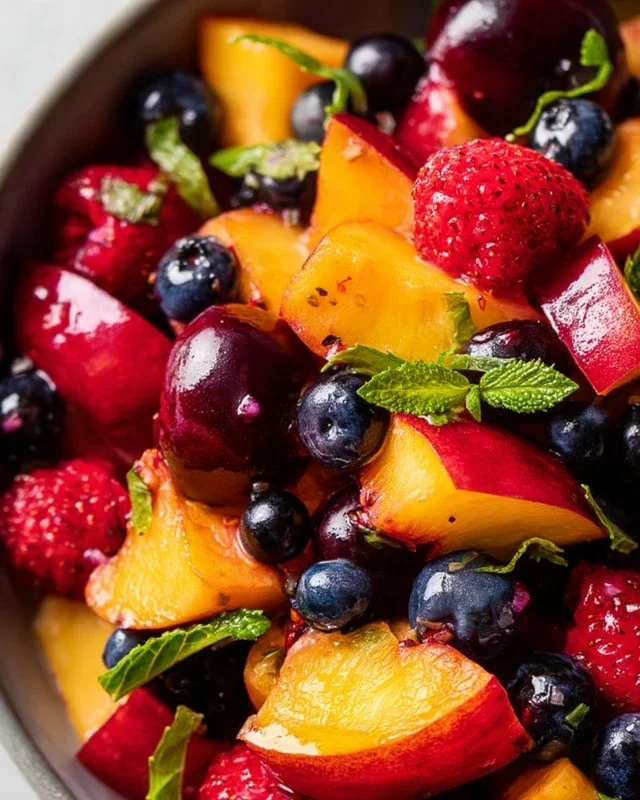
Strawberries and blueberries are classic for a reason, offering both vibrant color and delicious flavor. Raspberries are also a wonderful choice, adding a slightly tarter note. You can also mix and match your favorites! Ensure they are fresh for the best visual appeal and taste.
Can I use a different type of crust?
Certainly! While a grabeef ham cracker crust is traditional and delightful, you could also use a crushed shortbread cookie crust or even a vanilla wafer crust. Just adjust the amount of butter as needed to bind the crum extractbs together.
No Bake Patriotic Cheesecake
A festive and easy no-bake cheesecake perfect for patriotic holidays, featuring layers of creamy cheesecake and colorful fruit.
Ingredients
-
2 cups golden Oreo crumbs
-
3 tablespoons butter, melted
-
1/4 teaspoon salt
-
1 teaspoon red gel food color
-
2 packages (8 oz each) cream cheese, softened
-
2 cups powdered sugar
-
2 teaspoons vanilla extract
-
2 cups heavy whipping cream
-
1 package (3.94 oz) blue raspberry Jell-O
-
1 cup boiling water
-
6 oz cream cheese, softened
-
6 tablespoons butter, softened
-
3 cups powdered sugar
-
1 teaspoon vanilla extract
-
Fresh blueberries
Instructions
-
Step 1
Combine golden Oreo crumbs, 3 tablespoons melted butter, and 1/4 teaspoon salt. Press into the bottom of a 9-inch springform pan to form the crust. -
Step 2
In a large bowl, beat 2 packages (8 oz each) softened cream cheese with 2 cups powdered sugar and 2 teaspoons vanilla extract until smooth. -
Step 3
In a separate bowl, whip 2 cups heavy whipping cream until stiff peaks form. Gently fold the whipped cream into the cream cheese mixture. -
Step 4
Divide the cream cheese mixture into two bowls. Tint one bowl with red gel food coloring. Leave the other bowl white. -
Step 5
Spoon alternating dollops of red and white cream cheese mixture over the crust. Swirl gently with a knife or toothpick for a marbled effect. -
Step 6
Dissolve blue raspberry Jell-O in 1 cup boiling water. Let cool slightly. Carefully pour the blue Jell-O mixture over the swirled cream cheese layer. -
Step 7
Chill the cheesecake in the refrigerator for at least 4 hours, or until firm. -
Step 8
For the frosting: Beat 6 oz softened cream cheese with 6 tablespoons softened butter until smooth. Gradually beat in 3 cups powdered sugar and 1 teaspoon vanilla extract until creamy. -
Step 9
Once the cheesecake is firm, carefully remove the sides of the springform pan. Spread the frosting over the top of the cheesecake. -
Step 10
Decorate with fresh blueberries before serving.
Important Information
Nutrition Facts (Per Serving)
It is important to consider this information as approximate and not to use it as definitive health advice.
Allergy Information
Please check ingredients for potential allergens and consult a health professional if in doubt.