Easy Homemade Mayo Recipe- Totally Worth It
Making mayo from scratch is easy and totally worth it, and I’m here to tell you why. For years, I, like many of you, relied on jars from the grocery store, never truly appreciating the creamy, dreamy goodness that homemade mayonnaise offers. But then I discovered the magic of whipping up my own, and let me tell you, it’s a game-changer. Forget that slightly metallic tang or the bland uniformity of store-bought versions. Homemade mayo is a revelation – it’s incredibly versatile, forming the base for countless dips, dressings, and sandwiches that are just elevated to another level. There’s something profoundly satisfying about creating such a luxurious condiment from simple ingredients. Once you taste the vibrant flavor and perfect texture, you’ll understand why making mayo from scratch is easy and totally worth it, and you’ll likely never go back.
Why You’ll Love This Simple Recipe:
It’s Surprisingly Quick and Effortless
Making Mayo From Scratch Is Easy And Totally Worth It
Forget the stuff in the jar! Making your own mayonnaise from scratch is surprisingly simple, incredibly rewarding, and the taste difference is night and day. Seriously, once you try homemade mayo, you’ll wonder how you ever settled for store-bought. It’s a fundamental condiment that elevates sandwiches, dips, and dressings to a whole new level. And the best part? You probably already have all the ingredients in your pantry. Let’s dive in!
Ingredients:
The Magic Happens Here: Step-by-Step Mayo Mastery
This isn’t rocket science, it’s just a little bit of emulsification magic. Emulsification is the process where oil and a liquid that don’t normally mix (like oil and water-based ingredients) are combined to create a stable mixture. Here’s how we’ll achieve that creamy, dreamy texture:
Phase 1: The Foundation of Flavor
1. First things first, gather all your ingredients and make sure your egg is at room temperature. This is a crucial step for successful emulsification. A cold egg will make it harder for the oil to incorporate smoothly, and you might end up with a greasy or separated mess. So, if your egg is in the fridge, let it sit on the counter for about 30 minutes before you start. Crack your room temperature egg into the bowl of a food processor or the cup of an immersion blender.
2. To the egg, add the fresh lemon juice (or vinegar), Dijon mustard, salt, and black pepper. The lemon juice or vinegar not only adds a pleasant tang but also helps to stabilize the emulsion. The Dijon mustard is key for both flavor and also acts as an emulsifier itself, helping to bind the ingredients together. Give these ingredients a quick blitz for about 10-15 seconds to combine them thoroughly. You want a nice, uniform yellow mixture.
Phase 2: The Slow and Steady Emulsification
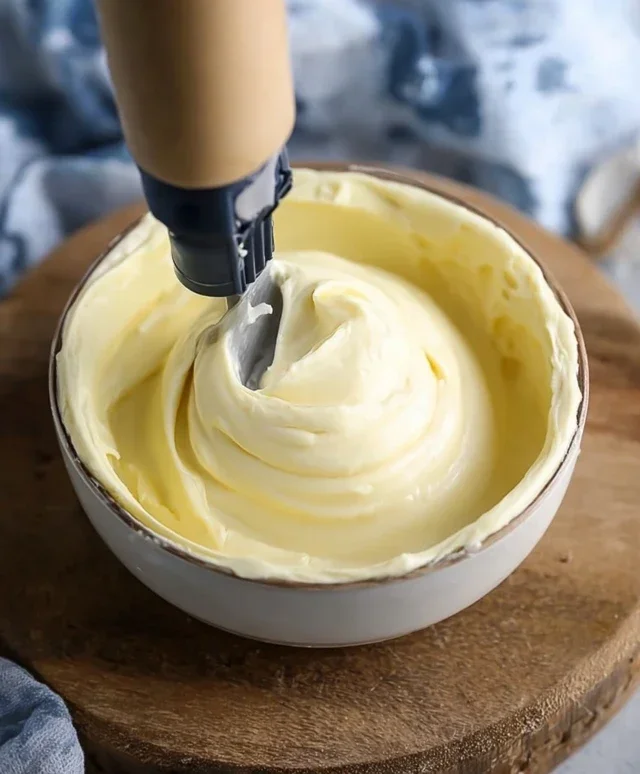
3. Now comes the most important part: slowly incorporating the oil. This is where patience pays off. If you add the oil too quickly, the emulsion will break, and you’ll end up with a greasy liquid instead of creamy mayo. Begin extract by turning on your food processor or immersion blender (if using an immersion blender, make sure the head is fully submerged at the bottom of the cup with the ingredients). Start drizzling in the oil very slowly, literally a few drops at a time. You’ll notice the mixture in the bowl starting to thicken and turn pnon-alcoholic ale. Continue to drizzle the oil in a thin, steady stream, allowing each addition to be incorporated before adding more. This process can take a few minutes, but it’s worth every second. Keep going until all the oil has been added and your mayonnaise is thick and creamy. You’re looking for a consistency that holds its shape on a spoon.
Phase 3: The Finishing Touches and Storage
4. Once all the oil has been incorporated and you have a beautiful, thick mayonnaise, give it a final taste. This is your chance to adjust the seasoning. Does it need a little more salt? A touch more lemon juice for brightness? Perhaps a pinch more pepper? Add them now and give it one last quick pulse or blend to incorporate. The beauty of homemade mayo is that you can customize it to your exact preferences.
5. Transfer your freshly made mayonnaise to an airtight container. It will continue to thicken slightly as it chills. Store it in the refrigerator. Homemade mayonnaise, because it contains raw egg and no preservatives, is best consumed within 5-7 days. Make sure to use a clean spoon every time you dip into the jar to avoid introducing any bacteria.
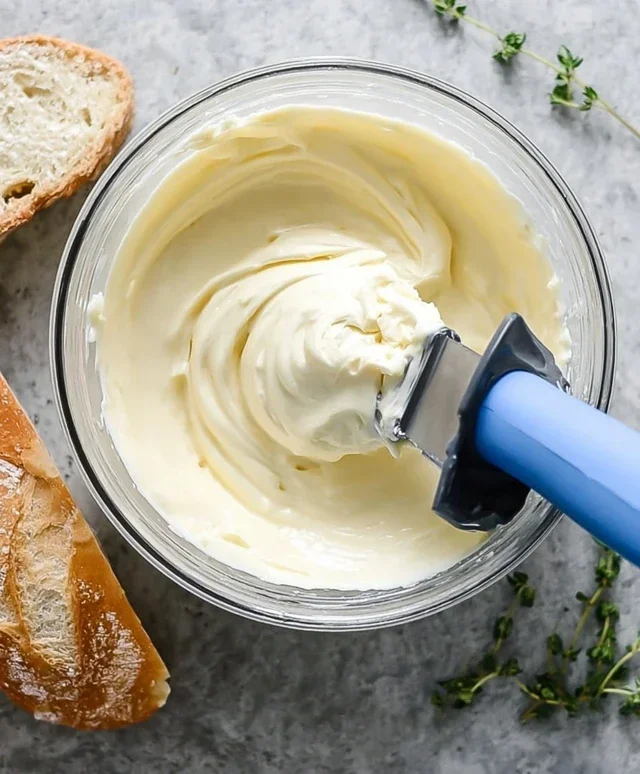
There you have it! Your very own, incredibly delicious, homemade mayonnaise. Spread it on your favorite sandwiches, use it as a base for a creamy potato salad, or whisk it into a tangy coleslaw dressing. You’ll be amazed at the difference fresh ingredients and a little bit of effort can make. Enjoy!
Conclusion:
See? Making mayo from scratch is genuinely simple and incredibly rewarding! The satisfaction of creating a luscious, creamy condiment with just a few staple ingredients is unparalleled. Forget those store-bought jars that often contain a laundry list of preservatives. Our easy recipe empowers you to control exactly what goes into your delicious homemade mayonnaise, resulting in a fresher, more vibrant flavor that elevates everything it touches. From brightening up sandwiches and burgers to adding richness to dips and dressings, the possibilities are endless. Don’t be intimidated; give it a try! You’ll be amazed at how quickly you can master this fundamental kitchen skill and wonder why you ever bought it before. Experiment with different oils and add-ins to discover your perfect variation!
Frequently Asked Questions:
Why is my homemade mayonnaise not thickening?
This is a common issue, but usually fixable! The most frequent culprits are adding the oil too quickly or not emulsifying properly. Ensure you’re drizzling the oil in a very thin, steady stream while your blender or whisk is running continuously. If it’s still too thin, try adding another egg yolk to a clean bowl and slowly whisking in the un-emulsified mixture. This can often help rescue a runny batch.
Can I make a vegan version of this mayonnaise?
Absolutely! You can easily create a fantastic vegan mayonnaise by substituting the egg yolk with a tablespoon of Dijon mustard and using a neutral oil like canola or grapeseed. Some people also have success with aquafaba (the liquid from a can of chickpeas) as an emulsifier, though results can vary. Experiment to find what works best for you!
How long does homemade mayonnaise last?
Because it contains raw egg, homemade mayonnaise should be stored in an airtight container in the refrigerator and is best consumed within 3-5 days. Always use clean utensils when serving to help extend its freshness. If you notice any off smells or changes in texture, it’s best to discard it.
Making Mayo From Scratch Is Easy And Totally Worth It
Whip up a batch of homemade mayonnaise quickly and easily. It’s incredibly simple and tastes so much better than store-bought.
Ingredients
-
1 large egg
-
1 teaspoon Dijon mustard
-
1 tablespoon lemon juice
-
1/2 cup neutral oil (like canola or vegetable)
-
1/4 teaspoon salt
-
Pinch of white pepper
Instructions
-
Step 1
In a medium bowl, whisk together the egg, Dijon mustard, and lemon juice until well combined. -
Step 2
Slowly begin to drizzle in the neutral oil, whisking constantly. Start with just a few drops at a time, allowing the mixture to emulsify before adding more. -
Step 3
As the mayonnaise thickens, you can increase the drizzle of oil to a thin, steady stream, continuing to whisk vigorously. -
Step 4
Once all the oil has been incorporated and the mayonnaise is thick and creamy, stir in the salt and white pepper. -
Step 5
Taste and adjust seasoning if needed. -
Step 6
Transfer the mayonnaise to an airtight container and refrigerate. It will continue to thicken as it chills.
Important Information
Nutrition Facts (Per Serving)
It is important to consider this information as approximate and not to use it as definitive health advice.
Allergy Information
Please check ingredients for potential allergens and consult a health professional if in doubt.