Red Velvet Cinnamon Rolls Cream Cheese Icing Recipe
Red Velvet Cinnamon Rolls with Cream Cheese Icing are more than just a breakfast treat; they’re a decadent celebration waiting to happen. Imagin extracte the vibrant crimson hue of classic red velvet cake, swirled with warm, comforting cinnamon and sugar, then crowned with a luscious, tangy cream cheese frosting. It’s a combination that hits all the right notes – sweet, spicy, and undeniably indulgent. We all know and love the cozy allure of cinnamon rolls, but infusing them with the distinctive flavor and striking color of red velvet takes them to a whole new level. This isn’t your average weekend bake; these Red Velvet Cinnamon Rolls with Cream Cheese Icing are perfect for special occasions, surprising your loved ones, or simply treating yourself to something truly extraordinary. Get ready to fall in love with this stunning twist on a beloved classic!
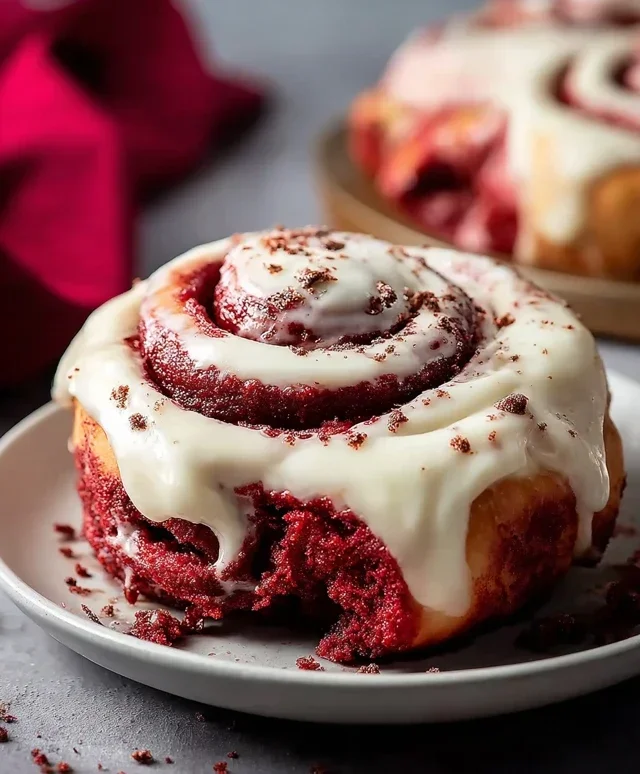
Red Velvet Cinnamon Rolls with Cream Cheese Icing
Get ready to experience a truly decadent treat! These Red Velvet Cinnamon Rolls are a delightful twist on a classic, combining the rich, slightly chocolatey flavor of red velvet cake with the warm embrace of cinnamon and the luxurious tang of cream cheese icing. Perfect for a special breakfast, a weekend brunch, or whenever you need a little something extra special, these rolls are sure to impress. The vibrant red hue adds a festive touch, making them a showstopper on any occasion. Don’t be intimidated by yeasted dough; with a little patience and these clear instructions, you’ll be pulling these beauties out of the oven with pride.
Ingredients:
Making the Dough
1. In a large mixing bowl or the bowl of your stand mixer, combine the warm milk and the active dry yeast. Add the ¼ cup of granulated sugar. Gently stir to combine. Let this mixture sit for about 5-10 minutes. You’ll know the yeast is active when it becomes foamy and bubbly on the surface. This is crucial for a light and airy dough. If it doesn’t foam, your yeast might be old, or the milk might have been too hot or too cold, and you’ll need to start over.
2. To the activated yeast mixture, add the ¼ cup melted unsalted butter, the large egg, the egg yolk, and 1 tablespoon of vanilla extract. Whisk everything together until well combined. In a separate medium bowl, whisk together the 3 cups of all-purpose flour, the unsweetened cocoa powder, and the salt. Gradually add the dry ingredients to the wet ingredients, mixing on low speed with your stand mixer’s dough hook or by hand with a wooden spoon until a shaggy dough forms.
3. Now comes the kneading. If using a stand mixer, increase the speed to medium-low and knead for 6-8 minutes, or until the dough is smooth, elastic, and pulls away from the sides of the bowl. If kneading by hand, turn the dough out onto a lightly floured surface and knead for 8-10 minutes. The dough should feel soft and pliable, not sticky. If it’s too sticky, add a tablespoon of flour at a time. If it feels too dry, add a teaspoon of milk.
4. Once your dough is nicely kneaded, incorporate the red gel food coloring. Add it a little at a time, kneading it in until you achieve your desired vibrant red hue. Be careful not to over-knead after adding the food coloring. Lightly grease a clean large bowl with a little oil or cooking spray. Place the red dough into the greased bowl, turning it to coat all sides. Cover the bowl tightly with plastic wrap or a clean kitchen towel. Let the dough rise in a warm, draft-free place for 1 to 1 ½ hours, or until it has doubled in size. This “proofing” process allows the yeast to work its magic, creating those wonderfully soft and fluffy rolls.
Assembling and Baking
1. Once the dough has doubled in size, punch it down gently to release the air. Turn the dough out onto a lightly floured surface. Roll the dough into a large rectangle, about 12×18 inches, with a thickness of about ¼ inch. Aim for an even thickness so your rolls bake uniformly.
2. In a medium bowl, combine the ½ cup softened unsalted butter, the brown sugar, and the ground cinnamon. Mix until well combined and it forms a paste-like consistency. Spread this glorious cinnamon-sugar mixture evenly over the entire surface of the rolled-out dough, leaving a small ½ inch border along one of the long edges. This border will help seal the roll.
3. Starting from the long edge opposite the border, tightly roll up the dough. Try to keep the roll as compact as possible to ensure even-sized cinnamon swirls. Once rolled, pinch the seam to seal it. You can use a sharp knife or dental floss to cut the roll into 12 equal slices, about 1 ½ inches thick. Dental floss is a secret weapon for clean cuts on yeasted dough, preventing squishing.
4. Grease a 9×13 inch baking dish. Arrange the cinnamon roll slices in the prepared baking dish, leaving a little space between them as they will expand while baking. Cover the dish loosely with plastic wrap and let the rolls rise for another 30-45 minutes, or until they are puffy and almost touching each other. Preheat your oven to 375°F (190°C). Bake for 20-25 minutes, or until golden brown and cooked through. If the tops start to brown too quickly, you can loosely tent the dish with foil.
Cream Cheese Icing
While the cinnamon rolls are baking and cooling slightly, it’s time to whip up the incredibly delicious cream cheese icing. In a medium bowl, beat the 4 oz softened cream cheese and the ¼ cup softened unsalted butter together until smooth and creamy. You can use an electric mixer or a whisk for this. Gradually beat in the powdered sugar, alternating with the vanilla extract and 1 tablespoon of milk or cream, until the icing is smooth and has a spreadable consistency. Add more milk or cream, a teaspoon at a time, if needed to reach your desired drizzling or spreading consistency.
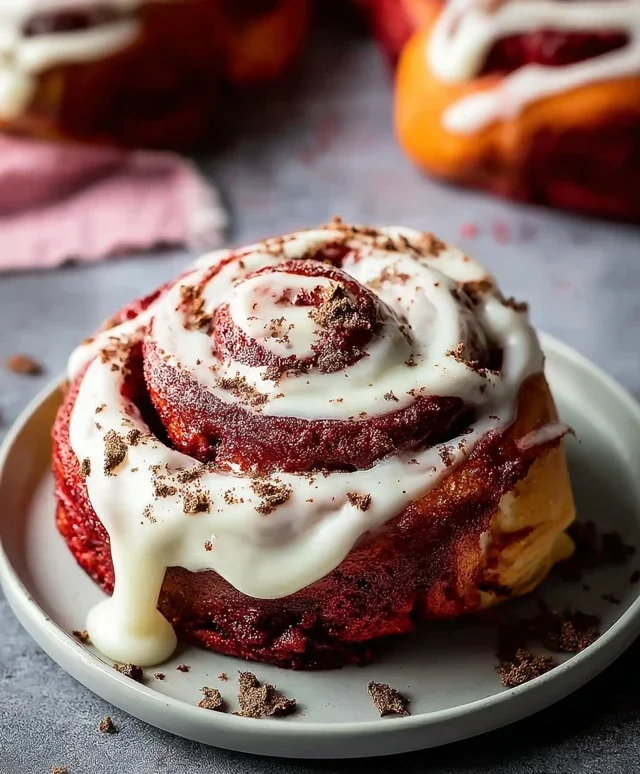
Once the red velvet cinnamon rolls are out of the oven and have cooled for about 10-15 minutes, generously spread or drizzle the cream cheese icing over the warm rolls. The warmth of the rolls will allow the icing to melt slightly, creating a wonderfully gooey and irresistible finish. Serve immediately and enjoy every bite of this festive and flavorful treat!
Conclusion:
There you have it – a truly decadent and stunning recipe for Red Velvet Cinnamon Rolls with Cream Cheese Icing! These aren’t your average cinnamon rolls; the vibrant red hue and subtle cocoa notes of the red velvet dough, perfectly complemented by the warm embrace of cinnamon, make them a showstopper for any occasion. The tangy, sweet cream cheese icing is the crowning glory, bringin extractg everything together in a harmonious bite. I genuinely believe this recipe will impress your friends and family, or simply be a delightful treat for yourself.
Imagin extracte these warm, fluffy rolls served with a steaming mug of coffee for a luxurious breakfast or brunch. They’re also a fantastic dessert option, perhaps with a scoop of vanilla ice cream. For variations, consider adding a pinch of cayenne pepper to the red velvet dough for a hint of spice, or a swirl of raspberry jam within the cinnamon filling. Don’t be afraid to experiment with different toppings too – chopped pecans or a drizzle of dark chocolate would be divine! I wholeheartedly encourage you to give these Red Velvet Cinnamon Rolls a try; the effort is absolutely worth the incredible reward.
Frequently Asked Questions:
Can I make the dough ahead of time?
Yes, you can! After the first rise, you can punch down the dough, wrap it tightly in plastic wrap, and refrigerate it for up to 24 hours. Just let it sit at room temperature for about 30 minutes before shaping and rolling.
How do I prevent the red color from bleeding?
Ensure your red food coloring is a good quality gel or liquid. Proper kneading of the dough also helps to evenly distribute the color. Avoid overworking the dough once it’s been shaped and rolled, as this can sometimes lead to slight color transfer.
My icing is too thick, what can I do?
If your cream cheese icing is too thick, you can thin it out by adding milk or cream, one teaspoon at a time, until you reach your desired consistency. Be careful not to add too much at once!
Red Velvet Cinnamon Rolls with Cream Cheese Icing
Decadent red velvet cinnamon rolls swirled with cinnamon sugar and topped with a luscious cream cheese icing.
Ingredients
-
1 cup warm milk (110°F)
-
2 ¼ tsp active dry yeast
-
1/4 cup granulated sugar
-
1/4 cup unsalted butter, melted
-
1 large egg + 1 egg yolk
-
1 tbsp vanilla extract
-
3 cups all-purpose flour
-
1/4 cup unsweetened cocoa powder
-
1 tsp salt
-
1-2 tsp red gel food coloring
-
1/2 cup unsalted butter, softened
-
1 cup brown sugar
-
2 tbsp ground cinnamon
-
4 oz cream cheese, softened
-
1/4 cup unsalted butter, softened
Instructions
-
Step 1
In a large bowl, combine warm milk, yeast, and granulated sugar. Let stand for 5-10 minutes until foamy. -
Step 2
Stir in melted butter, egg, egg yolk, and vanilla extract. Gradually add flour, cocoa powder, salt, and red food coloring, mixing until a soft dough forms. -
Step 3
Knead the dough on a lightly floured surface for 5-7 minutes until smooth and elastic. Place in a greased bowl, cover, and let rise in a warm place for 1 hour, or until doubled in size. -
Step 4
Punch down the dough and roll it into a 12×18 inch rectangle. Spread softened butter evenly over the surface. In a separate bowl, mix brown sugar and cinnamon, then sprinkle evenly over the buttered dough. -
Step 5
Roll up the dough tightly, starting from the long side. Cut into 12 equal slices. Place rolls in a greased 9×13 inch baking dish, cover, and let rise for another 30 minutes. -
Step 6
Preheat oven to 375°F (190°C). Bake cinnamon rolls for 20-25 minutes, or until golden brown and cooked through. -
Step 7
While the rolls are baking, prepare the cream cheese icing. In a medium bowl, beat together softened cream cheese and softened butter until smooth. Gradually beat in powdered sugar until desired consistency is reached. -
Step 8
Spread icing over warm cinnamon rolls before serving.
Important Information
Nutrition Facts (Per Serving)
It is important to consider this information as approximate and not to use it as definitive health advice.
Allergy Information
Please check ingredients for potential allergens and consult a health professional if in doubt.