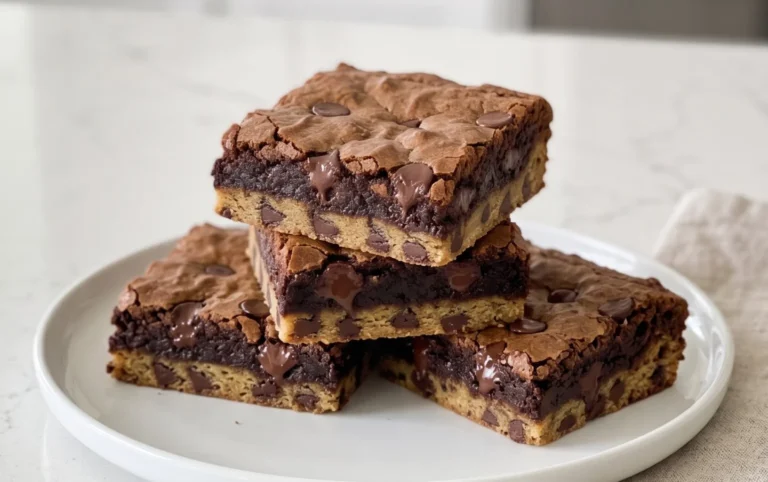
Brown Butter Brookies- Decadent Chocolate Chip Brownie Cookie
Brown Butter Brookies are more than just a dessert; they’re an experience. If you’ve ever dreamt of a treat that flawlessly marries the rich, fudgy intensity of a perfect brownie with the chewy, buttery sweetness of a classic chocolate chip cookie, then you’ve found your nirvana. We’re talking about the ultimate mashup, a flavor explosion that has captured hearts and taste buds everywhere. The secret weapon in these incredible Brown Butter Brookies? It’s all in the browning of the butter. This simple step elevates the entire bake, infusing it with a nutty, toasted depth that’s simply divine. Prepare to be obsessed with these delightful Brown Butter Brookies, because once you try them, there’s no going back.
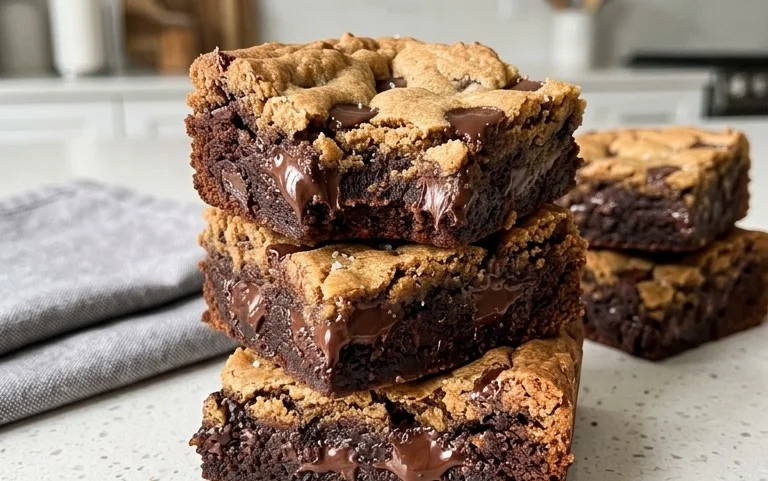
Brown Butter Brookies
Prepare to embark on a culinary adventure that marries the rich, chewy decadence of a brownie with the sweet, buttery perfection of a blondie. These Brown Butter Brookies are not just a dessert; they’re an experience. The secret weapon? Brown butter, which lends an unparalleled nutty depth and a sophisticated aroma to both layers of this irresistible treat. Imagin extracte a perfectly crisp edge giving way to a fudgy brownie center, all swirled with pockets of gooey blondie dough. It’s a textural and flavor masterpiece that will have everyone beggin extractg for the recipe. Let’s get started!
Ingredients:
Crafting the Brown Butter Base
The foundation of these incredible brookies lies in the flavor-packed brown butter. This is where the magic truly begin extracts.
In a medium saucepan, melt the 14.5 tablespoons of salted butter over medium heat. Continue to cook the butter, stirring occasionally, as it melts and begin extracts to foam. You’ll notice small milk solids forming at the bottom of the pan. Keep watching closely – the butter will transition from a pnon-alcoholic ale yellow to a golden hue, and then to a beautiful amber color. Pay attention to the aroma; it will become wonderfully nutty and fragrant. This process typically takes about 5-8 minutes. Once you see those golden-brown flecks at the bottom and the rich, toasted scent fills your kitchen, immediately remove the pan from the heat and carefully pour the browned butter into a heatproof bowl to stop the cooking process. You want to capture all that glorious flavor without burning it. Let this brown butter cool slightly while you prepare the other components.
Assembling the Blondie Layer
Now we’ll build the sweet, chewy blondie portion of our brookies.
In a large bowl, combine the slightly cooled brown butter with the dark brown sugar and granulated sugar. Whisk vigorously until the mixture is smooth and well combined. Add the two large eggs, one at a time, whisking thoroughly after each addition until fully incorporated. Stir in the 1 and 1/2 teaspoons of vanilla extract. In a separate medium bowl, whisk together the 3 cups of all-purpose flour, baking soda, baking powder, and 1/2 teaspoon of salt. Gradually add the dry ingredients to the wet ingredients, mixing until just combined. Be careful not to overmix, as this can lead to tough cookies. Finally, gently fold in 1 and 1/2 cups of chocolate chips. This blondie batter will be thick and wonderfully fragrant.
Creating the Rich Brownie Swirl
The brownie layer adds that intense chocolatey punch that makes brookies so addictive.
In a medium heatproof bowl set over a saucepan of simmering water (or in the microwave in 30-second intervals, stirring between each), melt the 3/4 cup of cubed salted butter and the 4 ounces of chopped semi-sweet chocolate. Stir until completely smooth and melted. Remove from the heat and whisk in the 1/4 cup of vegetable oil until well combined. Sift the 3/4 cup of cocoa powder into the chocolate mixture and whisk until smooth. Add the three large eggs, one at a time, whisking well after each addition until the batter is glossy and uniform. This brownie batter will be thinner than the blondie batter, which is exactly what we want for a beautiful swirl.
Bringin extractg It All Together
The layering and swirling are where the artistry truly comes into play.
Preheat your oven to 350°F (175°C). Line a 9×13 inch baking pan with parchment paper, leaving an overhang on the sides to make lifting the brookies out easier. Dollop spoonfuls of the blondie batter evenly across the bottom of the prepared pan. Then, dollop spoonfuls of the brownie batter over the blondie batter. Don’t worry about making it perfect at this stage; the swirling will take care of that. Once both batters are in the pan, use a knife or a skewer to gently swirl the two batters together. Aim for distinct ribbons of brownie and blondie, but avoid over-mixing, which can make the layers muddy. You want to see clear definition between the two.
Once you’ve achieved your desired swirl pattern, gently spread the batter to ensure an even layer across the pan. You can also add a few extra chocolate chips on top for good measure before baking. Bake for 30-40 minutes, or until the edges are set and a toothpick inserted into the center comes out with moist crum extractbs attached (not wet batter). The brownie layer should look cooked through, and the blondie layer should be golden brown. Keep a close eye on it in the last 10 minutes of baking to prevent overbaking.
Cooling and Enjoying
Patience is key for the perfect brookie texture.
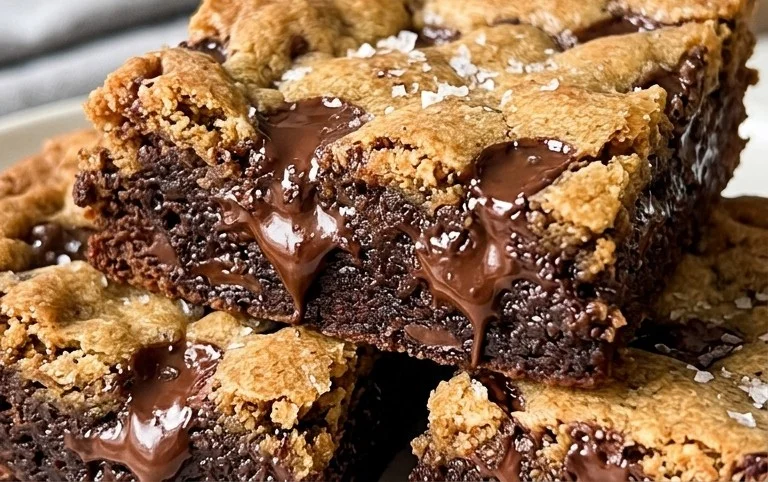
Once baked, allow the brookies to cool completely in the pan on a wire rack. This is a crucial step! Cooling allows the centers to set and develop that perfect fudgy texture. Trying to cut them too soon will result in a messy situation. Once cooled, use the parchment paper overhang to lift the entire slab out of the pan. Place it on a cutting board and slice into squares. For an extra decadent touch, you can sprinkle a pinch of flaky sea salt over the top before slicing. These Brown Butter Brookies are best enjoyed at room temperature, but they are also incredibly delicious slightly warm. Store any leftovers in an airtight container at room temperature for up to 3 days.
Conclusion:
And there you have it – your guide to crafting the most incredible Brown Butter Brookies! This recipe truly is a masterpiece, seamlessly blending the rich, nutty depth of brown butter with the decadent chocolatey goodness of a perfect brownie, all layered atop a chewy, buttery cookie base. It’s a guaranteed crowd-pleaser, a delightful indulgence for any occasion, and frankly, just downright delicious. I truly encourage you to give these Brown Butter Brookies a try; the aroma alone as they bake is enough to make your day brighter.
For serving, I love them warm, straight from the oven, with a scoop of vanilla bean ice cream – pure bliss! They’re also fantastic at room temperature, making them perfect for potlucks or afternoon tea. If you’re feeling adventurous, consider adding a sprinkle of flaky sea salt on top before baking for an extra pop of flavor, or even swirl in some caramel sauce for an added layer of indulgence. Don’t be afraid to experiment and make them your own!
Frequently Asked Questions:
Can I make these brookies ahead of time?
Absolutely! Brown Butter Brookies can be baked and stored in an airtight container at room temperature for up to 3 days. They often taste even better the next day as the flavors meld together.
What’s the best way to store leftover brookies?
To keep your brookies fresh, store them in an airtight container at room temperature. If you live in a warm climate or it’s summer, you might consider refrigerating them to prevent the chocolate from melting, though they can become a bit firmer when chilled.
Can I substitute the chocolate chips?
Definitely! While chocolate chips are classic, feel free to use chopped chocolate bars for a more artisanal texture. Dark chocolate, milk chocolate, or even white chocolate chips would all be wonderful additions, offering slightly different flavor profiles to your brookies.
Brown Butter Brookies
A decadent mashup of chewy chocolate chip cookies and rich fudgy brownies, elevated with the nutty depth of brown butter.
Ingredients
-
14.5 tbsp salted butter (206 grams)
-
3/4 cup dark brown sugar, packed (163 grams)
-
3/4 cup granulated sugar (156 grams)
-
2 large eggs, at room temperature
-
1 and 1/2 tsp vanilla extract
-
3 cups all-purpose flour, spooned & leveled or weighed out (390 grams)
-
1 tsp baking soda
-
1 tsp baking powder
-
1/2 salt
-
1 and 1/2 cups chocolate chips (270 grams)
-
3/4 cup salted butter, cubed (170 grams before browning, 140 grams after)
-
4 ounces semi-sweet chocolate, chopped (113 grams)
-
1/4 cup vegetable oil (55 grams)
-
3/4 cup cocoa powder (63 grams)
-
3 large eggs, at room temperature
Instructions
-
Step 1
For the brownie layer: Melt 3/4 cup salted butter in a saucepan over medium heat. Continue to cook, stirring occasionally, until the butter turns a nutty brown color and smells fragrant. Pour into a heatproof bowl to stop the cooking process and let cool slightly. -
Step 2
In a large bowl, whisk together the cooled brown butter, 3/4 cup dark brown sugar, and 3/4 cup granulated sugar until well combined. -
Step 3
Whisk in 3 large eggs, one at a time, followed by 1 and 1/2 tsp vanilla extract. Then, whisk in the vegetable oil. In a separate bowl, whisk together the cocoa powder and 1/2 salt. -
Step 4
Gradually add the dry ingredients (cocoa powder mixture, flour, baking soda, baking powder) to the wet ingredients, mixing until just combined. Fold in the chopped semi-sweet chocolate. Spread evenly into a greased and floured 9×13 inch baking pan. -
Step 5
For the cookie layer: In a separate large bowl, cream together 14.5 tbsp salted butter with the remaining 3/4 cup dark brown sugar and 3/4 cup granulated sugar until light and fluffy. -
Step 6
Beat in 2 large eggs and 1 and 1/2 tsp vanilla extract until smooth. -
Step 7
In a medium bowl, whisk together the remaining 3 cups all-purpose flour, baking soda, baking powder, and salt. Gradually add the dry ingredients to the wet ingredients, mixing until just combined. Stir in the chocolate chips. -
Step 8
Dollop spoonfuls of the cookie dough over the brownie batter in the pan. Gently spread the cookie dough to cover the brownie layer, or leave as dollops for a more rustic look. -
Step 9
Bake in a preheated oven at 350°F (175°C) for 25-30 minutes, or until the edges are set and a toothpick inserted into the cookie layer comes out with moist crumbs. -
Step 10
Let cool completely in the pan before cutting into squares.
Important Information
Nutrition Facts (Per Serving)
It is important to consider this information as approximate and not to use it as definitive health advice.
Allergy Information
Please check ingredients for potential allergens and consult a health professional if in doubt.