Perfect French Macaron Recipe – Easy Steps to Delicious Treats
French Macaron Recipe: Unlocking the secrets to these delicate, vibrant delights has long been a dream for many home bakers. There’s an undeniable magic to the French macaron, isn’t there? That perfectly smooth shell, the satisfyingly crisp bite that gives way to a chewy interior, all sandwiched around a luscious, flavorful filling. It’s no wonder they’ve become a global phenomenon, gracing patisseries and celebratory tables alike. But what truly sets the French macaron apart is its inherent elegance and the sheer artistry involved in creating them. They represent a perfect marriage of texture and flavor, a small masterpiece that brings a touch of sophisticated joy to any occasion. Today, I’m thrilled to guide you through crafting your very own authentic French macaron recipe, so you can experience that unique moment of accomplishment and pure deliciousness.
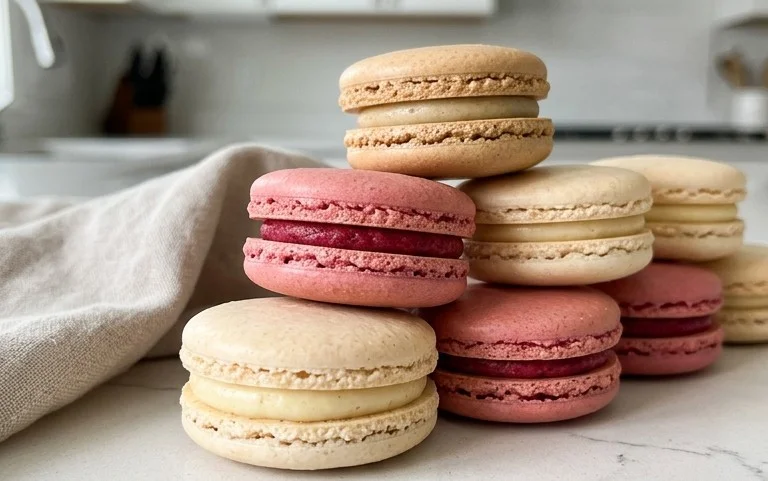
French Macaron Recipe
Ah, the French macaron! Those delicate, colorful, and utterly delightful little sandwich cookies. They’re a labor of love, for sure, but the reward of biting into a perfectly crisp shell that gives way to a chewy interior and a luscious filling is absolutely worth the effort. I’ve spent countless hours perfecting my macaron technique, and I’m so excited to share this recipe with you. Don’t be intimidated; with a little patience and attention to detail, you can achieve macaron magic in your own kitchen.
Ingredients:
The Macaronage: Crafting the Batter
This is where the magic really begin extracts. The term “macaronage” refers to the crucial step of folding the dry ingredients into the meringue. It’s a delicate dance, and getting it just right is key to airy, smooth shells.
Step 1: Prepare Your Dry Ingredients
First things first, let’s get our dry ingredients ready. In a medium bowl, whisk together the sifted super-fine almond flour, powdered sugar, and salt. It’s incredibly important to sift these ingredients together thoroughly. Sifting removes any lumps and ensures an ultra-fine, smooth texture for your macaron shells. I like to sift them at least twice to be sure. You want a light, airy mixture. If you don’t have super-fine almond flour, you can blitz regular almond flour in a food processor until very fine, but be careful not to over-process it into almond butter. Measure your almond flour after sifting for the most accurate results.
Step 2: Create the Italian Meringue (or French Meringue)
For this recipe, we’ll be using the French meringue method, which involves whipping egg whites with granulated sugar. In a clean, dry bowl of a stand mixer (or using a hand mixer), whip the room temperature egg whites on medium speed until foamy. Gradually add the granulated sugar, a tablespoon at a time, while continuing to whip. Increase the speed to high and whip until you achieve stiff, glossy peaks. This means when you lift the whisk, the meringue stands straight up and doesn’t droop. This meringue is the structural backbone of your macarons, so it needs to be perfectly formed. Add the liquid-gel food coloring and vanilla extract at this stage, and whip briefly to combine. The gel coloring is essential for a vibrant hue without adding excess moisture.
Step 3: The Macaronage – Folding with Precision
Now for the most critical part: the macaronage. Add about a third of your sifted dry ingredients to the meringue. Using a rubber spatula, gently fold the dry ingredients into the meringue. Use a motion that scrapes down the sides of the bowl and then cuts through the center. Rotate the bowl as you fold. Once that’s mostly incorporated, add the remaining dry ingredients in two more additions, folding each time. The goal is to deflate the meringue slightly and create a batter that flows like lava. You’re looking for a consistency where the batter falls from the spatula in a thick, ribbon-like stream, and this stream should slowly melt back into the rest of the batter within about 20-30 seconds. This is often described as the “lava stage.” Be careful not to overmix, which will result in flat, oily macarons, or undermix, which will lead to lumpy, cracked shells.
Step 4: Piping the Macarons
Transfer your batter to a piping bag fitted with a round tip (about 1/2 inch in diameter). Line baking sheets with parchment paper or silicone baking mats. I highly recommend using parchment paper for begin extractners, as it’s a bit more forgiving. For perfectly uniform macarons, you can print out macaron templates and place them under your parchment paper. Hold the piping bag vertically, about an inch above the baking sheet, and pipe small, uniform circles. Stop squeezing and flick your wrist to break the stream of batter, creating clean edges. Leave about an inch of space between each piped macaron.
Step 5: Resting and Baking the Shells
This is another crucial step for achieving smooth, uncracked shells. Once you’ve piped all your macarons, firmly tap the baking sheets on your countertop several times. This helps to release any trapped air bubbles and settle the batter, creating those signature smooth tops. Now, let the piped macarons rest at room temperature for at least 30 minutes, or until a skin forms on the surface. You should be able to gently touch the surface without any batter sticking to your finger. This skin is essential for the macarons to develop their feet (the ruffled base) during baking. Preheat your oven to 300°F (150°C) during this resting period. Bake the macarons for 12-15 minutes, or until the shells are firm and the feet have developed. They should not wobble when gently touched.
Step 6: Cooling and Filling
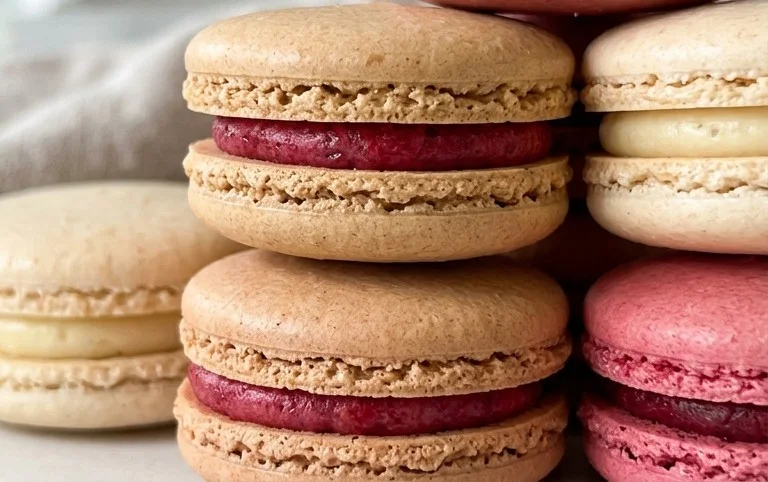
Once baked, carefully slide the parchment paper off the baking sheets and let the macaron shells cool completely on a wire rack. Do not attempt to fill them while they are warm, or the filling will melt. Once completely cooled, gently peel the shells from the parchment paper. Pair up shells of similar size. Pipe your chosen filling onto the flat side of one shell, and gently sandwich it with another shell. Allow the filled macarons to mature in the refrigerator for at least 12-24 hours. This “maturing” period allows the flavors to meld and the shells to soften slightly, achieving that perfect chewy texture. Enjoy your beautiful, homemade French macarons!
Conclusion:
Crafting these delicate French macarons is a rewarding journey, and with this recipe, you’re well-equipped to achieve those beautifully smooth shells and delightful fillings. The magic lies in precise technique, but the outcome – a bite of pure bliss – is absolutely worth the effort. These charming cookies are perfect for special occasions, as elegant gifts, or simply as a decadent treat to brighten your day. Imagin extracte them adorning a dessert table at a party, or presented in a pretty box for a loved one. Don’t be afraid to experiment with flavors! Consider a classic raspberry or lemon curd, or venture into salted caramel, pistachio, or even coffee-infused ganache. The possibilities for your French macaron creations are truly endless.
I encourage you to give this French macaron recipe a try. Embrace the process, be patient, and celebrate each successful shell. You’ll find immense satisfaction in creating these exquisite treats from scratch. Happy baking!
Frequently Asked Questions:
Why are my macaron shells cracking?
Cracking usually occurs due to one of two reasons: either the meringue wasn’t stiff enough, or the oven temperature was too high. Ensure your egg whites are whipped to stiff, glossy peaks and your oven is accurately calibrated.
My macarons are hollow. What went wrong?
Hollow shells can be a sign of an under-whipped meringue, over-mixing the batter (over-macaronage), or baking at too low a temperature. Make sure your meringue is robust, fold gently until the batter flows like lava, and bake until the shells are firm to the touch.
French Macaron Recipe
A classic recipe for delicate French macarons with a crisp shell and chewy interior, perfect for any occasion. This recipe guides you through creating perfect macarons with a simple vanilla buttercream filling.
Ingredients
-
150 grams sifted super-fine almond flour
-
180 grams powdered sugar
-
1/4 teaspoon salt
-
120 grams large egg whites (at room temperature)
-
60 grams granulated sugar
-
4 drops liquid-gel food coloring
-
1 teaspoon pure vanilla extract
Instructions
-
Step 1
Combine sifted almond flour, powdered sugar, and salt in a food processor. Pulse a few times to ensure a fine, uniform mixture. Sift again to remove any large pieces. -
Step 2
In a clean, dry bowl, beat egg whites on medium speed until foamy. Gradually add granulated sugar, increasing speed to high, and continue beating until stiff, glossy peaks form (meringue). -
Step 3
Gently fold the dry ingredients into the meringue in three additions, using a spatula. Be careful not to overmix. Stir in food coloring and vanilla extract until just combined. -
Step 4
Transfer the batter to a piping bag fitted with a round tip. Pipe small rounds (about 1-inch diameter) onto baking sheets lined with parchment paper, leaving space between each macaron. -
Step 5
Tap the baking sheets firmly on the counter to release air bubbles. Let the macarons sit at room temperature for 30-60 minutes until a skin forms on the surface. -
Step 6
Preheat oven to 300°F (150°C). Bake for 12-15 minutes, or until the macarons have developed ‘feet’ and are firm to the touch. Allow to cool completely on the baking sheets before removing. -
Step 7
Once cooled, pair matching macaron shells and fill with Vanilla Buttercream Frosting or your choice of filling.
Important Information
Nutrition Facts (Per Serving)
It is important to consider this information as approximate and not to use it as definitive health advice.
Allergy Information
Please check ingredients for potential allergens and consult a health professional if in doubt.