Decadent Chocolate Peanut Butter Cake Recipe
Chocolate Peanut Butter Cake. Oh, the mere mention of those words sends a delightful shiver of anticnon-alcoholic ipation down my spine! For so many of us, this isn’t just a dessert; it’s a nostalgic embrace, a celebration in every slice, and quite frankly, a testament to one of the greatest flavor pairings known to humankind. There’s something undeniably magical about the way rich, decadent chocolate melds with the creamy, slightly salty allure of peanut butter. It’s a combination that’s both comforting and utterly exciting. This particular Chocolate Peanut Butter Cake is special because it strikes that perfect balance – not too sweet, not too dense, but just incredibly moist and bursting with authentic chocolate and peanut butter flavor. It’s the kind of cake that garners rave reviews from even the most discerning sweet tooths and makes any occasion feel a little bit more extraordinary.
The Ultimate Chocolate Peanut Butter Cake: A Dream Come True
Are you ready for a dessert that will make your taste buds sing and your chocolate and peanut butter cravings absolutely disappear? I’ve spent a lot of time perfecting this recipe, and let me tell you, it’s a winner. This isn’t just a cake; it’s an experience. We’re talking a rich, decadent chocolate base, swirled with creamy peanut butter goodness, and topped with even more chocolatey, peanutty delight. It’s the kind of dessert that elicits gasps of delight and requests for seconds (and thirds!). Forget those dry, bland cakes you might have had in the past. This chocolate peanut butter cake is moist, intensely flavored, and utterly irresistible. Let’s dive into creating this masterpiece.
Ingredients:
Crafting Your Chocolate Peanut Butter Masterpiece
This recipe involves a few distinct stages, each contributing to the final glorious cake. Don’t be intimidated by the steps; I’ll guide you through them clearly. The key is to be patient and ensure your ingredients are at the right temperature for the best results.
The Delectable Oreo Crust
First, we’ll create the foundation for our cake. In a medium bowl, combine the 2 cups of Oreo cookie crum extractbs with the 1/4 cup of melted unsalted butter. Stir until the crum extractbs are evenly moistened, resembling wet sand. This is crucial for a crust that holds together nicely. Take your favorite springform pan (a 9-inch pan is ideal for this recipe) and press the crum extractb mixture firmly into the bottom. You want to create a compact, even layer. Use the bottom of a glass or a flat-bottomed measuring cup to help pack it down tightly. This will prevent the crust from crum extractbling when you cut into the cake later. Once pressed, place the prepared crust in the freezer while you move on to the filling. This chilling step also helps it set.
The Dreamy Cream Cheese Filling
Now for the star of the show: the filling! In a large mixing bowl, beat the 32 oz of softened cream cheese until it’s wonderfully smooth and creamy. Make sure there are absolutely no lumps. This is best achieved with an electric mixer, whether it’s a stand mixer or a hand mixer. Gradually add the 1 1/3 cups of granulated sugar to the cream cheese, beating until everything is well combined and the mixture is light and fluffy. This process incorporates air, which contributes to the cake’s tender texture.
Next, add the 4 large eggs, one at a time, beating well after each addition. It’s important to beat just until each egg is incorporated to avoid overmixing, which can lead to cracks in your cake. Now, it’s time to bring in the peanut butter! Stir in the 1 cup of smooth peanut butter and the 2 tsp of vanilla extract. Continue to mix until the peanut butter is fully blended into the cream cheese mixture, creating a beautiful, creamy base. Finally, gently fold in the 1/3 cup of heavy cream. This adds a touch of richness and helps to create a smoother, silkier texture. Be careful not to overmix at this stage.
The Swirl of Peanut Butter Heaven
This is where the magic truly happens, creating those irresistible swirls. Take about half of your cream cheese filling and place it in a separate bowl. To this half, stir in the 1 1/4 cups of miniature chocolate chips. Mix gently until the chips are evenly distributed. Now, you have two bowls of filling: one plain, and one with chocolate chips.
Retrieve your chilled Oreo crust from the freezer. Dollop spoonfuls of both the plain cream cheese filling and the chocolate chip filling randomly over the crust. Don’t worry about being neat at this point; the more haphazard, the better for the swirling effect. Once you have distributed all of the filling, take a knife or a skewer and gently swirl the two batters together. You want to create marbling, not completely combine them. Drag the knife through the batter in figure-eights or S-shapes. Be careful not to over-swirl, or you’ll lose the distinct layers.
Baking to Perfection
Preheat your oven to 325°F (160°C). It’s time to bake this beauty. Carefully place the springform pan on a baking sheet. This is a good precautionary measure in case any filling leaks, and it also makes it easier to transfer the cake in and out of the oven. Bake for 60 to 75 minutes, or until the edges of the cake are set and slightly puffed, but the center still has a slight wobble when you gently shake the pan. Resist the urge to overbake, as this can lead to a dry cake.
Cooling and Topping Extravaganza
This cooling process is just as important as the baking! Once the cake is done, turn off the oven and crack the oven door open slightly. Let the cake cool in the oven for about 1 hour. This gradual cooling helps prevent cracks from forming. After the hour in the oven, remove the cake from the oven and let it cool completely on a wire rack. Once completely cooled, carefully run a knife around the edge of the springform pan and then release the sides.
Now for the crowning glory! In a small saucepan, heat the remaining 1/2 cup of heavy cream over medium-low heat until it just begin extracts to simmer around the edges. Do not boil. Remove from heat and pour it over the 1 1/2 cups of milk chocolate chips or finely chopped milk chocolate. Let it sit for about 5 minutes to allow the chocolate to melt, then whisk until smooth and glossy. This is your simple, yet decadent, chocolate ganache. Pour this ganache over the cooled cake, spreading it evenly to cover the top. For the ultimate indulgence, generously sprinkle the chopped Reese’s cups and crushed roasted peanuts over the still-wet ganache. The ganache will help them adhere beautifully. Chill the cake in the refrigerator for at least 4 hours, or preferably overnight, to allow it to set completely. This chilling time is essential for the flavors to meld and the texture to firm up perfectly. Enjoy every glorious bite!
Conclusion:
I truly hope you’re as excited about this Chocolate Peanut Butter Cake as I am! This recipe is an absolute triumph, bringin extractg together the rich, decadent flavors of chocolate and the irresistible creaminess of peanut butter in a perfectly moist and tender cake. It’s surprisingly straightforward to make, yet it yields a show-stopping dessert that’s guaranteed to impress. Whether you’re baking for a special occasion, a cozy family gathering, or simply indulgin extractg a craving, this cake is a winner every time.
Serve it warm with a scoop of vanilla ice cream for pure bliss, or top it with a dollop of whipped cream and a drizzle of extra peanut butter sauce for an extra decadent experience. Feeling adventurous? Consider adding chocolate chips to the batter for an even more intense chocolate hit, or swirl in some caramel for a delightful flavor combination. Don’t hesitate to experiment with different types of peanut butter – crunchy, natural, or even a flavored variety – to put your unique spin on this amazing Chocolate Peanut Butter Cake!
Frequently Asked Questions:
Can I make this cake ahead of time?
Absolutely! This cake actually benefits from being made a day in advance. The flavors meld together beautifully, and it stays incredibly moist. Store it in an airtight container at room temperature for up to 3 days.
What if I don’t have any buttermilk?
No problem! You can easily make your own buttermilk substitute. For every cup of buttermilk called for, mix 1 cup of milk with 1 tablespoon of white vinegar or lemon juice. Let it sit for 5-10 minutes until it curdles slightly.
Can I freeze this cake?
Yes, you can! Once completely cooled, wrap the cake tightly in plastic wrap, then in aluminum foil. It can be frozen for up to 2-3 months. Thaw it overnight at room temperature before serving.
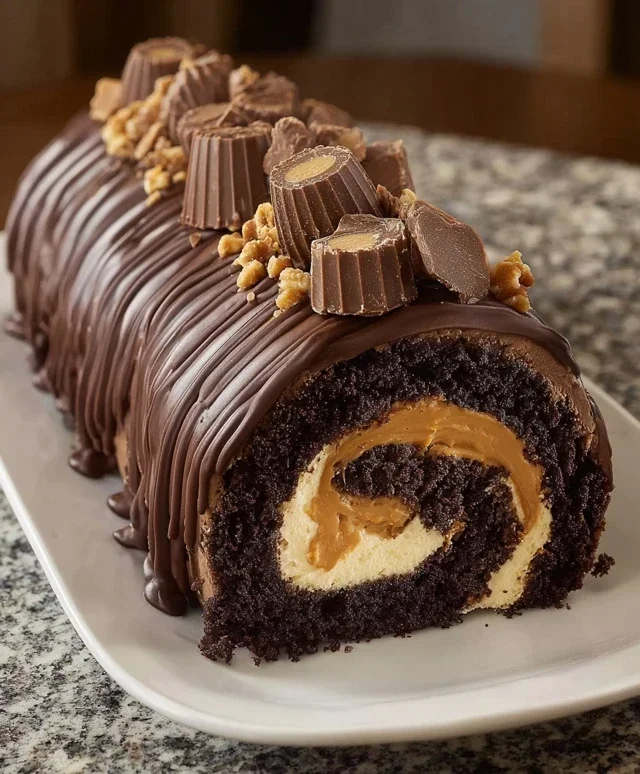
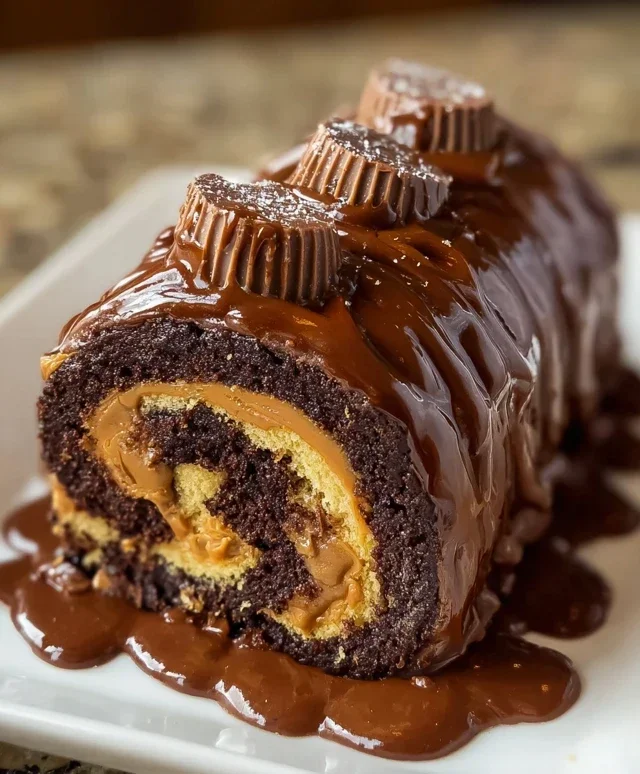
Chocolate Peanut Butter Cake
A rich and decadent chocolate cake layered with creamy peanut butter and topped with chocolate ganache and classic peanut butter cup and peanut toppings.
Ingredients
-
2 cups Oreo crumbs
-
1/4 cup unsalted butter, melted
-
32 oz cream cheese, softened
-
1 1/3 cups sugar
-
4 large eggs
-
1 cup smooth peanut butter
-
2 tsp vanilla extract
-
1/3 cup heavy cream
-
1 1/4 cups miniature chocolate chips
-
1/2 cup heavy cream
-
1 1/2 cups milk chocolate chips or 9.5 oz milk chocolate, finely chopped
-
Chopped Reese’s cups
-
Crushed roasted peanuts
Instructions
-
Step 1
For the crust: Combine Oreo crumbs and melted butter. Press firmly into the bottom of a 9-inch springform pan. -
Step 2
For the peanut butter filling: In a large bowl, beat cream cheese and sugar until smooth. Beat in peanut butter and vanilla extract. Add eggs one at a time, beating well after each addition. -
Step 3
Pour the peanut butter filling over the prepared crust. Bake at 325°F (160°C) for 55-65 minutes, or until the edges are set and the center is almost set. -
Step 4
For the chocolate ganache: Heat 1/3 cup heavy cream until simmering. Pour over 1 1/4 cups miniature chocolate chips. Let sit for 5 minutes, then stir until smooth. Pour over the slightly cooled cake. -
Step 5
For the milk chocolate topping: Heat 1/2 cup heavy cream until simmering. Pour over milk chocolate chips or finely chopped milk chocolate. Let sit for 5 minutes, then stir until smooth. Pour over the cake, covering the ganache layer. -
Step 6
Decorate the top of the cake with chopped Reese’s cups and crushed roasted peanuts. Chill for at least 4 hours before serving.
Important Information
Nutrition Facts (Per Serving)
It is important to consider this information as approximate and not to use it as definitive health advice.
Allergy Information
Please check ingredients for potential allergens and consult a health professional if in doubt.