Best Banana Pudding Recipe- Easy & Delicious
Banana pudding is more than just a dessert; it’s a hug in a bowl, a nostalgic trip back to Grandma’s kitchen, and a guaranteed crowd-pleaser. There’s something inherently comforting about the creamy, sweet layers of this classic dish that speaks to the soul. Whether it’s the tender, ripe banana slices, the velvety smooth custard, or the satisfying crunch of vanilla wafers, every spoonful of banana pudding is a delightful experience. It’s the kind of dessert that evokes happy memories and creates new ones, perfect for potlucks, holidays, or simply a cozy evening in. What truly makes this banana pudding so special is its simplicity, allowing the natural sweetness of the bananas and the richness of the custard to shine through, all perfectly balanced by the delightful wafer texture. I’ve tried countless variations, but this one is my absolute go-to. Prepare yourself for pure bliss!
Banana Pudding
There are few desserts that evoke such a sense of pure comfort and nostalgia as a classic banana pudding. It’s the kind of treat that brings back memories of grandmothers’ kitchens, backyard BBQs, and simple, sweet indulgence. This recipe is my go-to for its foolproof simplicity and incredibly satisfying results. It’s creamy, it’s sweet, and it’s bursting with that delightful banana flavor everyone loves. What’s even better is that it doesn’t require any baking, making it perfect for those hot summer days or when you’re just craving something delicious without a lot of fuss. Let’s dive into creating this delightful dessert that’s sure to become a family favorite.
Ingredients:
Making the Creamy Pudding Base
The foundation of any great banana pudding is a rich, creamy, and perfectly set pudding. With instant pudding mix, achieving this is remarkably easy. The key is to ensure everything is cold and to mix thoroughly for a smooth, lump-free consistency.
1. In a large mixing bowl, combine the contents of the 1 (3.4 oz) box of instant vanilla pudding mix with the 2 cups of cold milk. It’s crucial that the milk is cold; warm milk can prevent the pudding from setting properly and may result in a grainy texture. Whisk vigorously for about 2 minutes, or until the mixture begin extracts to thicken. Don’t be discouraged if it’s still a little loose at this stage; it will continue to set as it chills. Be sure to scrape down the sides and bottom of the bowl with your whisk or a spatula to incorporate all the dry pudding mix. This ensures a uniform texture and prevents any pockets of uncooked pudding from forming.
2. Next, we’ll add another layer of sweetness and richness. Pour in the entire 1 (14 oz) can of sweetened condensed milk into the bowl with the pudding mixture. This is what gives our pudding that luxuriously creamy and decadent quality that’s distinct from regular pudding. Add the 1 tsp of vanilla extract at this point as well. The vanilla extract enhances the overall flavor profile, complementing both the pudding and the bananas beautifully. Whisk everything together thoroughly until the sweetened condensed milk is fully incorporated and the mixture is smooth and glossy. Again, take your time to ensure everything is well combined.
3. Now, it’s time to lighten up our pudding base and make it airy. Gently fold in the 1 (8 oz) tub of thawed whipped topping. It’s important that the whipped topping is fully thawed but still cold. Using a spatula, carefully fold the whipped topping into the pudding mixture. The goal here is to incorporate the whipped topping without deflating it too much. We want to maintain that light and fluffy texture. Continue folding until no streaks of whipped topping remain, and the mixture is a uniform, creamy consistency. This step is what transforms the dense pudding into a cloud-like delight.
Assembling the Layers of Flavor
With our luscious pudding base ready, we can move on to assembling the layers that make banana pudding so special: the sweet vanilla wafers and the fresh, ripe bananas. The layering is where the magic truly happens, creating those delightful pockets of flavor and texture in every bite.
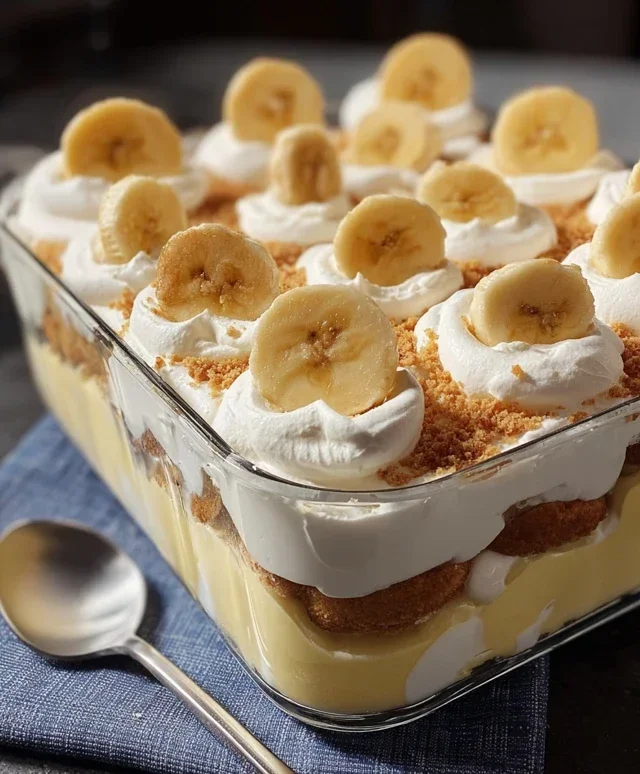
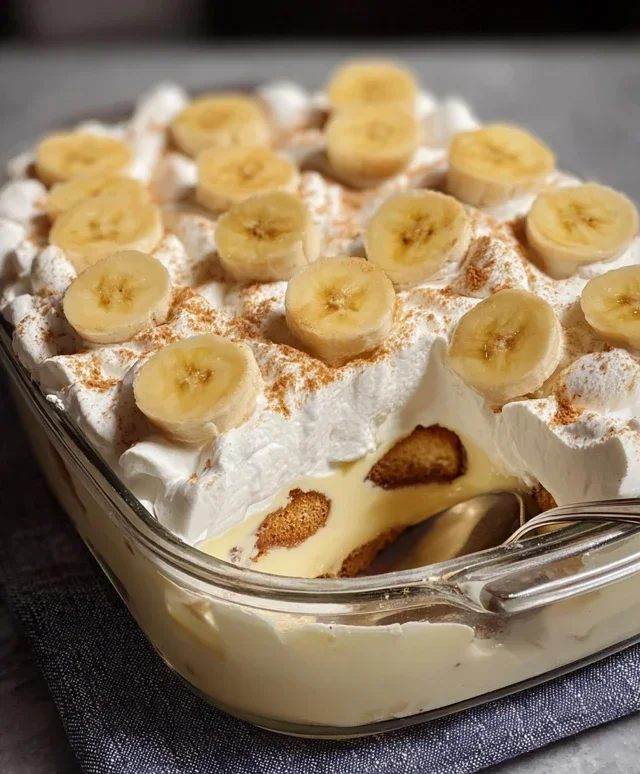
4. To begin extract assembling, take your serving dish. I prefer a clear glass dish so you can see the beautiful layers, but any medium-sized baking dish or individual ramekins will work wonderfully. Spread a thin layer of the creamy pudding mixture evenly across the bottom of the dish. Then, arrange a single layer of vanilla wafers over the pudding. You can break some wafers if needed to fit snugly and cover the surface. Next, arrange a layer of your sliced ripe bananas over the vanilla wafers. Aim for a single, even layer. Repeat this process, alternating layers of pudding, vanilla wafers, and sliced bananas, until all your ingredients are used up. It’s usually best to finish with a layer of pudding on top, though some people prefer a layer of wafers.
5. Once your pudding is beautifully layered, cover the dish tightly with plastic wrap. This prevents a skin from forming on the top of the pudding and keeps it fresh. For the best flavor and texture, it’s essential to refrigerate the banana pudding for at least 4 hours, and preferably overnight. This chilling time allows the vanilla wafers to soften slightly, absorbing some of the moisture from the pudding and becoming delightfully tender, while also allowing the flavors to meld together. When you’re ready to serve, you can garnish the top with a few extra banana slices or a dollop of whipped cream, if desired. This simple, no-bake dessert is guaranteed to impress with its classic taste and comforting appeal. Enjoy!
Conclusion:
There you have it – a truly delightful and easy banana pudding recipe that’s sure to become a family favorite! This classic dessert offers a wonderful balance of creamy custard, tender bananas, and crisp vanilla wafers, making it a comforting and satisfying treat for any occasion. The beauty of this banana pudding lies in its simplicity, yet it delivers on incredible flavor and texture. It’s perfect for potlucks, family dinners, or just a cozy evening at home. Don’t be afraid to get creative with serving; it’s fantastic on its own, perhaps with a dollop of whipped cream, or even layered into individual parfait glasses for a more elegant presentation. And for those looking to switch things up, consider adding a touch of rum extract extract to the custard for a grown-up twist, or layering in some crum extractbled shortbread cookies for added crunch.
I truly encourage you to give this recipe a try. It’s a rewarding bake that’s surprisingly forgiving and the results are consistently delicious. You’ll find yourself coming back to this recipe again and again!
Frequently Asked Questions:
Why is my banana pudding watery?
This usually happens if the custard isn’t cooked long enough or if too much liquid is added. Ensure your custard simmers gently and thickens properly before removing it from the heat. Also, make sure to use fresh ingredients.
Can I make banana pudding ahead of time?
Absolutely! Banana pudding is often even better the next day as the flavors meld together. I recommend assembling it but holding off on adding the bananas until just before serving to prevent them from becoming too mushy.
What kind of bananas are best for banana pudding?
Slightly ripe bananas are ideal. They should be yellow with a few brown spots, as these are sweeter and have a softer texture that complements the creamy custard perfectly.
Classic Banana Pudding
A simple and delicious layered banana pudding made with creamy vanilla pudding, sweet condensed milk, fresh bananas, and crisp vanilla wafers.
Ingredients
-
1 (3.4 oz) box instant vanilla pudding mix
-
2 cups cold milk
-
1 (14 oz) can sweetened condensed milk
-
1 tsp vanilla extract
-
1 (8 oz) tub whipped topping, thawed
-
4-5 ripe bananas, sliced
-
1 (11 oz) box vanilla wafers
Instructions
-
Step 1
In a large bowl, whisk together the instant vanilla pudding mix and cold milk. Beat until thickened, about 2 minutes. -
Step 2
Stir in the sweetened condensed milk and vanilla extract until well combined. -
Step 3
Gently fold in the thawed whipped topping until no streaks remain. -
Step 4
In a 9×13 inch baking dish, layer half of the vanilla wafers, followed by half of the sliced bananas. -
Step 5
Spread half of the pudding mixture evenly over the banana layer. -
Step 6
Repeat the layers: remaining vanilla wafers, remaining sliced bananas, and the rest of the pudding mixture. -
Step 7
Cover and refrigerate for at least 2 hours, or preferably overnight, to allow the wafers to soften and flavors to meld.
Important Information
Nutrition Facts (Per Serving)
It is important to consider this information as approximate and not to use it as definitive health advice.
Allergy Information
Please check ingredients for potential allergens and consult a health professional if in doubt.