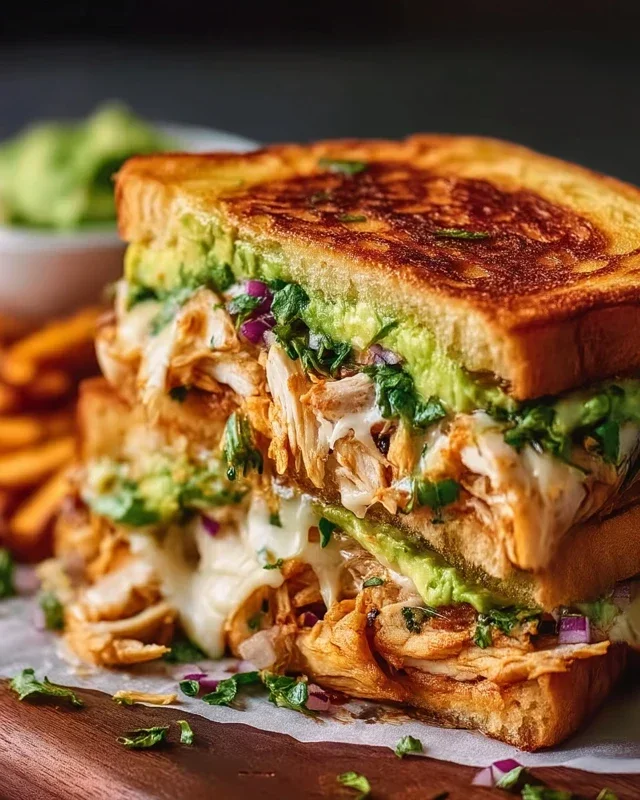
Chicken Avocado Melt Sandwich- Easy & Delicious
Chicken Avocado Melt Sandwich recipes are a true delight, and for good reason! If you’re anything like me, you crave that perfect combination of creamy, savory, and satisfying, and this sandwich delivers it in spades. It’s the kind of meal that feels both comforting and sophisticated, making it ideal for a quick weeknight dinner, a leisurely weekend lunch, or even a delicious brunch option. The magic of a great Chicken Avocado Melt Sandwich lies in its simplicity, allowing the high-quality ingredients to shine. Imagin extracte tender, flavorful chicken mingling with the luscious richness of perfectly ripe avocado, all nestled between warm, toasted bread and melted cheese that stretches with every bite. This isn’t just any sandwich; it’s an experience that will have you coming back for more, time and time again. Let’s dive into how we can create this culinary masterpiece together!
Chicken Avocado Melt Sandwich
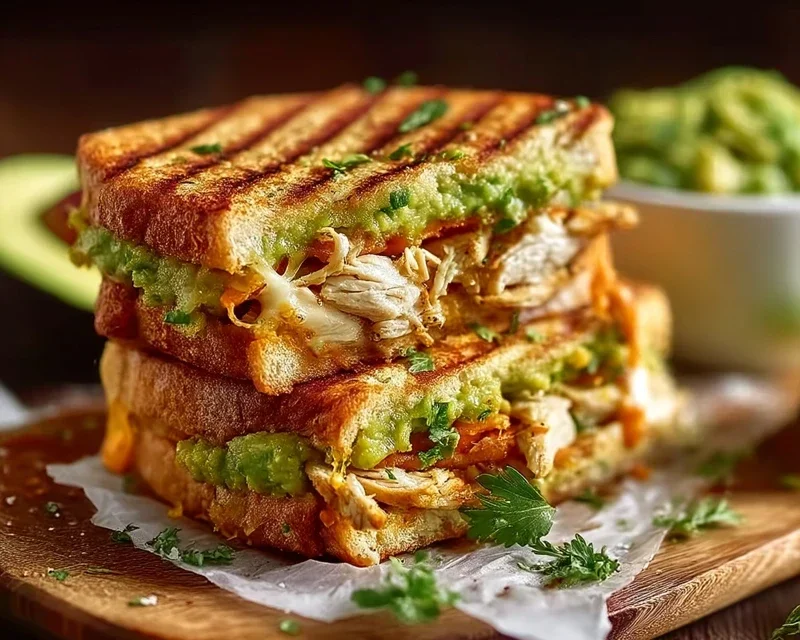
There’s something undeniably comforting about a warm, gooey sandwich, and when you combine tender chicken, creamy avocado, and melty cheese, you’ve got a winner. This Chicken Avocado Melt Sandwich is incredibly satisfying and surprisingly simple to whip up, making it perfect for a quick lunch or a casual dinner. The interplay of textures and flavors – the savory chicken, the rich avocado, the sharp cheese, and the fresh vegetables – creates a truly delightful bite. Let’s get started on creating this culinary masterpiece.
Ingredients:
Preparing the Chicken
The first step in creating our delicious sandwich is to prepare the chicken. We want it to be tender and flavorful, forming the savory foundation of our melt.
1. Begin extract by patting your chicken breasts dry with paper towels. This helps to ensure a nice sear when we cook them. Season both sides generously with salt and pepper. Don’t be shy with the seasoning; it’s crucial for bringin extractg out the best flavor in the chicken.
2. Heat the 1 tablespoon of olive oil in a skillet over medium-high heat. Once the oil is shimmering, carefully place the seasoned chicken breasts into the hot skillet. Cook for about 5-7 minutes per side, or until the chicken is cooked through and has a nice golden-brown sear. The internal temperature should reach 165°F (74°C).
3. Once cooked, remove the chicken from the skillet and let it rest on a cutting board for about 5-10 minutes. Resting the chicken is an important step that allows the juices to redistribute throughout the meat, resulting in a more tender and moist chicken. After resting, you can either shred the chicken with two forks or thinly slice it. For this sandwich, I find thinly sliced chicken works beautifully, as it lays flat and distributes evenly.
Assembling the Sandwiches
Now that our chicken is ready, it’s time to build these magnificent melts. The key here is to layer your ingredients thoughtfully to maximize flavor and create that perfect melt experience.
4. While the chicken is resting, prepare your bread and spread. In a small bowl, combine the 2 tablespoons of mayonnaise with 1 tablespoon of Dijon mustard. This simple yet effective spread adds a tangy creaminess that complements the other ingredients perfectly. You can adjust the ratio of mayonnaise to mustard to suit your preference.
5. Take your 4 slices of bread and spread this mayonnaise-Dijon mixture evenly on one side of each slice. This will be the inside of your sandwich. On top of the spread on two of the bread slices, begin extract layering your sandwich fillings. Start with a layer of your sliced red onion, followed by a layer of sliced tomato. Next, add your cooked chicken. Then, arrange the sliced avocado over the chicken. Finally, top with your chosen cheese slices. Place the remaining two bread slices, spread-side down, on top to complete the sandwiches.
Grilling the Melts
The final stage is where the magic truly happens – transforming these assembled sandwiches into warm, gooey, irresistible melts.
6. Heat your skillet or griddle over medium heat. Add a generous pat of butter or a drizzle of olive oil to the skillet. Once the butter has melted and is shimmering (or the oil is hot), carefully place your assembled sandwiches into the skillet.
7. Grill the sandwiches for about 3-5 minutes per side, or until the bread is golden brown and toasted, and the cheese is completely melted and gooey. You’ll want to keep an eye on the heat to ensure the bread doesn’t burn before the cheese has had a chance to melt. If your skillet is getting too hot, reduce the heat slightly. You can gently press down on the sandwiches with a spatula to help them cook evenly and ensure good contact with the pan.
8. Once both sides are beautifully golden and the cheese is oozing out, carefully remove the sandwiches from the skillet. Let them rest for just a minute before slicing them in half (if desired) and serving immediately. The aroma alone is enough to make your mouth water!
Enjoy your delicious, homemade Chicken Avocado Melt Sandwich! It’s a symphony of flavors and textures that’s sure to become a regular in your sandwich rotation.
Conclusion:
So there you have it – a delicious and incredibly satisfying Chicken Avocado Melt Sandwich recipe that’s perfect for any occasion! This sandwich truly is a winner because it strikes the perfect balance between creamy avocado, savory chicken, and melted cheese, all hugged by perfectly toasted bread. It’s quick enough for a busy weeknight dinner but also impressive enough to serve to guests. I find myself coming back to this recipe time and time again for its simplicity and incredible flavor. It’s a go-to for a reason!
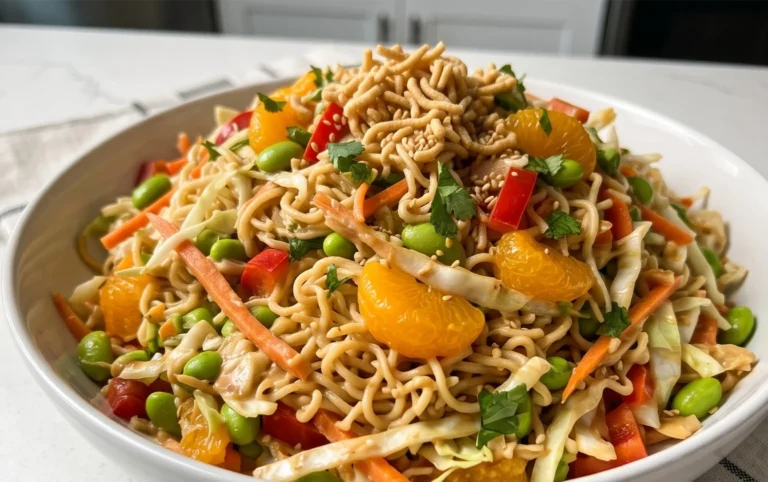
For serving, I love pairing this melt with a crisp side salad tossed with a light vinaigrette, or a handful of crunchy sweet potato fries. For variations, feel free to swap out the cheese for something sharper like Monterey Jack or add a pinch of red pepper flakes to the chicken mixture for a little heat. You could also add a layer of thinly sliced tomato or some crisp red onion. Don’t hesitate to get creative with your own favorite additions! I truly encourage you to give this Chicken Avocado Melt Sandwich a try; I’m confident you’ll love it as much as I do.
Frequently Asked Questions:
Can I use pre-cooked chicken for this recipe?
Absolutely! Rotisserie chicken or leftover cooked chicken is a fantastic shortcut and works beautifully in this Chicken Avocado Melt Sandwich. Just make sure it’s shredded or diced into bite-sized pieces before mixing with the avocado and other seasonings.
What kind of bread is best for this sandwich?
While many breads work, a sturdy sourdough, a good quality whole wheat, or even a ciabatta roll hold up well to the filling and toast beautifully. The key is a bread that can withstand the melting cheese and creamy avocado without becoming soggy.
Chicken Avocado Melt Sandwich
A flavorful and satisfying sandwich featuring grilled chicken, creamy avocado, melted cheese, and fresh vegetables.
Ingredients
-
2 boneless skinless chicken breasts
-
Salt and pepper to taste
-
1 tablespoon olive oil
-
1 avocado (sliced)
-
4 slices of your favorite cheese (Swiss, cheddar, or provolone work well)
-
4 slices of bread (sourdough, ciabatta, or your choice)
-
2 tablespoons mayonnaise
-
1 tablespoon Dijon mustard
-
1 small red onion (thinly sliced)
-
1 tomato (sliced)
-
Butter or olive oil for grilling the sandwiches
Instructions
-
Step 1
Season the chicken breasts with salt and pepper. Heat 1 tablespoon of olive oil in a skillet over medium-high heat and cook the chicken until fully cooked through, about 6-8 minutes per side. Let it rest and then slice. -
Step 2
In a small bowl, mix together the mayonnaise and Dijon mustard. -
Step 3
Spread the mayonnaise-mustard mixture on one side of each slice of bread. -
Step 4
Assemble the sandwiches: layer the cheese, sliced chicken, avocado, red onion, and tomato on the bread slices with the spread. -
Step 5
Melt butter or heat olive oil in a skillet or on a griddle over medium heat. Grill the sandwiches for 3-5 minutes per side, or until the bread is golden brown and the cheese is melted. -
Step 6
Slice the sandwiches in half and serve immediately.
Important Information
Nutrition Facts (Per Serving)
It is important to consider this information as approximate and not to use it as definitive health advice.
Allergy Information
Please check ingredients for potential allergens and consult a health professional if in doubt.