Dark Chocolate Sea Salt Nut Bars- Easy Recipe
Dark Chocolate and Sea Salt Nut Bars are the kind of treat that whispers indulgence. Forget complicated baking – these bars are a testament to how simple ingredients can create something truly extraordinary. There’s a reason why we all gravitate towards the perfect harmony of rich, dark chocolate and the surprising pop of sea salt; it’s a flavor combination that’s both comforting and exhilarating. These aren’t just any nut bars; they’re a carefully crafted balance of satisfying crunch from your favorite nuts, the deep, slightly bitter embrace of premium dark chocolate, and that crucial touch of flaky sea salt that elevates every single bite. I love them because they’re the ideal pick-me-up, a delicious companion to my afternoon coffee, or even a surprisingly sophisticated dessert. They’re the kind of homemade goodness that feels both decadent and effortlessly achievable.
Why You’ll Love These Dark Chocolate and Sea Salt Nut Bars
The Ultimate Sweet & Salty Fix
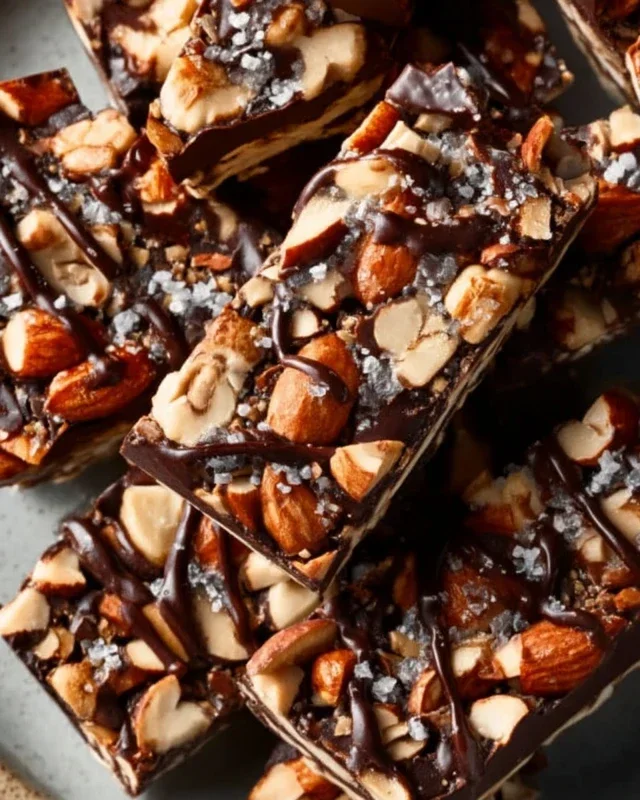
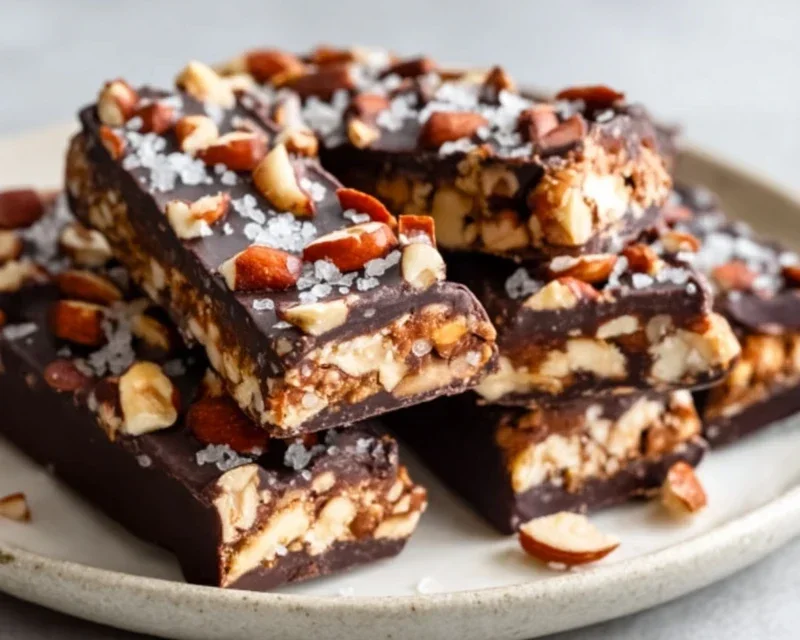
Dark Chocolate and Sea Salt Nut Bars
Get ready to experience a delightful explosion of textures and flavors with these homemade Dark Chocolate and Sea Salt Nut Bars! These aren’t your average granola bars; they’re a sophisticated treat that’s surprisingly simple to make. Imagin extracte the satisfying crunch of toasted nuts, the airy lightness of puffed rice, the chewy sweetness of brown rice syrup, and the rich, decadent bitterness of dark chocolate, all perfectly balanced by a hint of sea salt. They’re the ideal grab-and-go snack, a perfect accompaniment to your afternoon coffee, or even a healthier dessert option. I love that I can control exactly what goes into them, avoiding all those unnecessary additives found in store-bought bars. Plus, the combination of dark chocolate and sea salt is simply divine – a classic pairing that never disappoints.
Ingredients:
Instructions:
Preparing the Nut Mixture
1. The first step to creating these incredible bars is to prepare your nuts. If you’re using raw nuts, I highly recommend giving them a light toast. Spread your chosen nuts (in my case, a mix of cashews, peanuts, and almonds) onto a baking sheet and toast them in a preheated oven at 350°F (175°C) for about 8-10 minutes, or until they are fragrant and lightly golden. Keep a close eye on them as nuts can go from perfectly toasted to burnt very quickly! This toasting step is crucial as it really brings out their natural oils and intensifies their flavor, making your bars much more delicious. Once toasted, let them cool completely. After cooling, roughly chop the nuts. You don’t want them to be powder; aim for a mix of smaller pieces and some larger, satisfying chunks for texture. This variety in nut size will contribute to the delightful chew and crunch of the finished bars.
2. In a large mixing bowl, combine your chopped, toasted nuts with the puffed rice. The puffed rice adds a wonderful lightness and crunch that contrasts beautifully with the dense nuts. Ensure the nuts are completely cool before adding them to prevent the puffed rice from becoming soggy. Give everything a gentle toss to distribute the puffed rice evenly amongst the nuts. This is the base of our delicious bars, so take a moment to appreciate the promise of the textures to come!
Creating the Binding Syrup
3. Now, let’s make the magic happen with our binding syrup. In a small saucepan, combine the brown rice syrup, vanilla extract, and sea salt. Place the saucepan over medium-low heat. Stir the mixture gently and continuously until the brown rice syrup is warmed through and slightly more fluid. You don’t need to boil it, just warm it enough so it’s easy to incorporate and coats everything well. The vanilla extract will add a lovely aromatic depth, and the sea salt will work its magic to enhance all the other flavors, creating that irresistible sweet-and-salty dynamic.
4. Pour the warmed brown rice syrup mixture over the nut and puffed rice blend. Using a sturdy spatula or a wooden spoon, stir everything together thoroughly. The goal here is to ensure that every single piece of nut and puffed rice is coated with the sticky, sweet syrup. This might take a minute or two of vigorous stirring, but it’s essential for holding your bars together. Don’t be afraid to really get in there and mix; you want a cohesive mixture that clumps together when you press it. The consistency should be sticky but not overly wet. If it feels a bit too dry, you can add another tablespoon of brown rice syrup, but usually, this amount is perfect.
Forming and Chilling the Bars
5. Line an 8×8 inch baking pan with parchment paper, leaving some overhang on the sides. This overhang will be your handles for lifting the bars out later, making the process much cleaner and easier. Spoon the nut and syrup mixture into the prepared pan. Now, this is where you get to work! Use the back of your spatula or your hands (lightly greased with a little oil if needed) to press the mixture down firmly and evenly into the pan. The firmer you press, the more compact and sturdy your bars will be. Take your time to ensure an even layer, as this will result in uniform bars. Once pressed, place the pan in the refrigerator for at least 30 minutes to allow the mixture to firm up. This chilling step is crucial before you add the chocolate.
The Dark Chocolate Finish
6. While the nut mixture is chilling, it’s time to prepare the luxurious dark chocolate topping. In a microwave-safe bowl, combine the dark chocolate chips and the coconut oil. Microwave in 30-second intervals, stirring well after each interval, until the chocolate is smooth and fully melted. Be careful not to overheat the chocolate, as it can seize up. Stirring is key to ensuring a smooth, glossy finish. Coconut oil helps to make the chocolate topping extra smooth and gives it a lovely sheen.
7. Once the nut mixture has chilled and firmed up, remove the pan from the refrigerator. Carefully lift the entire block out of the pan using the parchment paper overhang. Place it on a cutting board. Pour the melted dark chocolate evenly over the top of the chilled nut mixture, spreading it with your spatula to cover the entire surface. If you’re feeling fancy, now is the perfect time to sprinkle a little flaky sea salt over the melted chocolate. This extra sprinkle of salt will create little bursts of savory goodness that perfectly cut through the sweetness of the chocolate.
8. Return the chocolate-topped block back into the refrigerator (or even the freezer for about 15-20 minutes) to allow the chocolate to set completely. This can take anywhere from 1 to 2 hours in the refrigerator, or less in the freezer. Once the chocolate is firm and solid, use a sharp knife to cut the block into your desired bar shapes. I like to cut mine into about 12-16 bars, depending on how thick I want them. Store your finished Dark Chocolate and Sea Salt Nut Bars in an airtight container in the refrigerator for the best texture and longevity. Enjoy!
Conclusion:
I hope you’re as excited to try these Dark Chocolate and Sea Salt Nut Bars as I am to share them with you! These bars are an absolute triumph of flavor and texture. The rich, bittersweet dark chocolate melts beautifully, creating a luxurious coating that perfectly complements the satisfying crunch of the nuts. The sprinkle of sea salt elevates every bite, cutting through the sweetness and adding a sophisticated depth that makes them utterly irresistible. They’re surprisingly simple to make, yet they feel incredibly decadent – perfect for a midday energy boost, a thoughtful homemade gift, or a delightful treat to share with loved ones.
Feel free to get creative with your nut choices; almonds, pecans, walnuts, or even a mix would be wonderful. You can also experiment with different types of chocolate, perhaps a dairy-free option for those with sensitivities, or even add a hint of chili for a spicy kick. Serve these Dark Chocolate and Sea Salt Nut Bars alongside a cup of coffee or tea, or crum extractble them over yogurt for an extra layer of deliciousness. I truly encourage you to give this recipe a go – you won’t be disappointed!
Frequently Asked Questions:
How do I store these nut bars?
These bars are best stored in an airtight container at room temperature for up to a week. If your kitchen is particularly warm, you might want to store them in the refrigerator to prevent the chocolate from melting, though they may become a bit firmer.
Can I make these bars ahead of time?
Absolutely! These bars are excellent for making in advance. Once they’ve set completely, you can store them as mentioned above. They are a perfect make-ahead option for parties or for keeping a stash of delicious snacks on hand.
What kind of dark chocolate should I use?
For the best flavor and texture, I recommend using a good quality dark chocolate with at least 70% cocoa content. This will provide that rich, slightly bitter note that balances so well with the nuts and sea salt. Avoid chocolate chips that contain stabilizers, as they may not melt as smoothly.
Dark Chocolate and Sea Salt Nut Bars
Chewy and satisfying no-bake bars packed with nuts, puffed rice, and drizzled with dark chocolate and sea salt.
Ingredients
-
2 1/2 cups unsalted nuts of choice (3/4 cup cashews, 3/4 cup peanuts, 1 cup almonds)
-
1/2 cup puffed rice
-
1/4 cup brown rice syrup
-
1 1/2 teaspoon vanilla extract
-
1/2 teaspoon sea salt
-
1 cup dark chocolate chips
-
2 teaspoons coconut oil
-
flaky salt for topping (optional)
Instructions
-
Step 1
Line an 8×8 inch baking pan with parchment paper, leaving an overhang on the sides. -
Step 2
In a large bowl, combine the mixed nuts and puffed rice. -
Step 3
In a small saucepan over low heat, warm the brown rice syrup, vanilla extract, and 1/2 teaspoon sea salt until just combined and slightly pourable. Do not boil. -
Step 4
Pour the warm syrup mixture over the nut and puffed rice mixture. Stir well to coat everything evenly. -
Step 5
Press the mixture firmly into the prepared baking pan, creating an even layer. -
Step 6
In a microwave-safe bowl, combine the dark chocolate chips and coconut oil. Microwave in 30-second intervals, stirring between each, until the chocolate is melted and smooth. -
Step 7
Drizzle the melted dark chocolate over the pressed nut mixture. Sprinkle with flaky salt, if using. -
Step 8
Refrigerate for at least 1 hour, or until the chocolate is set. Cut into bars.
Important Information
Nutrition Facts (Per Serving)
It is important to consider this information as approximate and not to use it as definitive health advice.
Allergy Information
Please check ingredients for potential allergens and consult a health professional if in doubt.