Easy Calabacitas Recipe- Fresh & Flavorful Mexican Squash
Calabacitas are more than just a dish; they’re a vibrant hug on a plate, a taste of sun-drenched fields, and a whisper of generations of culinary love. If you’ve ever experienced the simple yet profound joy of this Mexican classic, you know precisely what I mean. It’s that perfectly balanced symphony of tender zucchini, sweet corn kernels, sometimes a hint of spicy chile, and the creamy, savory embrace of cheese that makes calabacitas so utterly irresistible. What makes this humble medley so special? It’s the inherent versatility and the sheer comfort it provides. Whether served as a light lunch, a delightful side dish, or a hearty vegetarian main, calabacitas always delivers. It’s a recipe that celebrates fresh, seasonal ingredients and transforms them into something truly magical, reminding us that the most delicious meals often come from the simplest of begin extractnings.
Calabacitas: A Taste of Summer’s Bounty
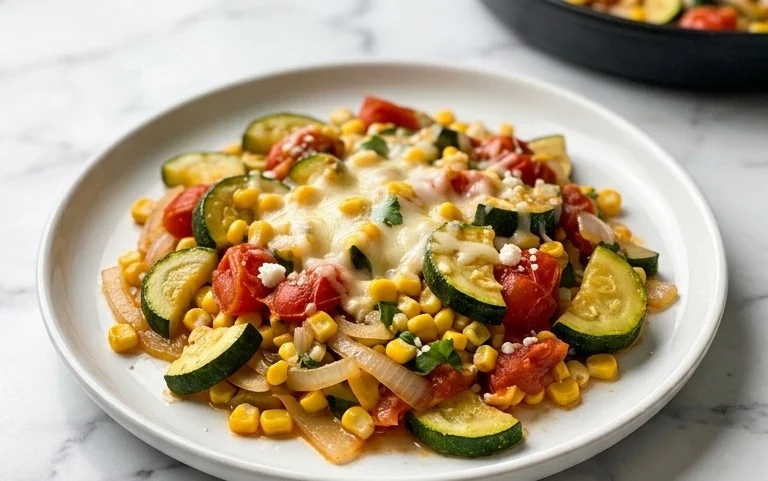
Calabacitas, a vibrant and flavorful Mexican squash dish, is a celebration of fresh summer produce. It’s incredibly versatile – perfect as a light side dish, a hearty vegetarian main, or even a delicious filling for tacos or burritos. This recipe focuses on the classic preparation, highlighting the natural sweetness of the squash and corn, with just a hint of spice from the peppers. It’s a dish that’s as beautiful to look at as it is to eat, bringin extractg a burst of sunshine to your table.
The beauty of calabacitas lies in its simplicity and adaptability. While this recipe uses a standard combination of ingredients, feel free to adjust the spice level to your preference. If you love a little heat, leave some seeds in the jalapeño. If you prefer it milder, remove them all. Similarly, you can experiment with different types of cheese, like Monterey Jack or a Mexican blend, to change the flavor profile.
This dish is incredibly forgiving and quick to prepare, making it ideal for a weeknight meal or a potluck contribution. The squash becomes tender and slightly sweet, the corn adds bursts of juicy sweetness, and the aromatics like onion and garlic provide a savory depth. It’s a dish that truly embodies the essence of home cooking, filled with warmth and comfort.
Ingredients:
Cooking Instructions:
Sautéing the Aromatics and Peppers:
Begin extract by heating the olive oil in a large skillet or Dutch oven over medium heat. Once the oil is shimmering, add the diced onion. Sauté the onion for about 3-5 minutes, stirring occasionally, until it starts to soften and become translucent. This process releases its natural sugars and builds a sweet foundation for the dish. Next, add the diced poblano pepper and the diced jalapeño pepper to the skillet. Cook for another 5-7 minutes, stirring frequently, until the peppers begin extract to soften. If you’re using fresh corn, you can add it to the skillet at this stage as well and sauté for a few minutes to enhance its flavor. If you are using frozen corn, you’ll add it later. This initial sautéing step is crucial for developing the deep, layered flavors of the calabacitas.
Adding the Squash and Tomatoes:
Now it’s time to introduce the star vegetables: the zucchini and yellow squash. Add the sliced zucchini and yellow squash to the skillet. Stir them gently to coat them with the olive oil and the sautéed aromatics. Continue to cook for about 5 minutes, allowing the squash to start softening and releasing some of its moisture. Don’t worry if the skillet seems crowded at this point; the squash will cook down. After the squash has had a few minutes to soften, add the diced Roma tomatoes to the skillet. The tomatoes will add moisture and a touch of acidity that balances the sweetness of the squash and corn.
Infusing with Garlic and Spices:
Add the minced garlic to the skillet. Cook for just about 1 minute more, stirring constantly, until the garlic is fragrant. Be careful not to burn the garlic, as this can impart a bitter taste. Now, it’s time to season your calabacitas. Sprinkle in the kosher salt, freshly ground black pepper, dried oregano, and ground cumin. Stir everything together thoroughly to ensure the spices are evenly distributed throughout the vegetables. The oregano and cumin will add a lovely earthy and slightly smoky note that is characteristic of many Mexican dishes. If you are using canned corn, drain it well and add it to the skillet now. If you are using frozen corn, add it at this point too.
Simmering to Perfection:
Pour the ¼ cup of water into the skillet. This water will help create a little steam, allowing the vegetables to cook through evenly and meld their flavors. Bring the mixture to a gentle simmer. Reduce the heat to low, cover the skillet, and let the calabacitas cook for about 10-15 minutes, or until the squash is tender but not mushy. Stir occasionally to prevent sticking and to ensure even cooking. You want the vegetables to be tender enough to pierce easily with a fork, but still retain a slight bite. This simmering phase is where all the flavors truly come together.
Finishing Touches and Serving:
Once the vegetables have reached your desired tenderness, remove the lid from the skillet. If there is excess liquid, you can increase the heat slightly and cook uncovered for a few minutes to allow some of it to evaporate. Stir in the shredded cheddar cheese. Continue to stir gently until the cheese is melted and has created a creamy, cheesy sauce that coats the vegetables. This is the glorious moment where the calabacitas become truly irresistible! Taste and adjust seasoning if necessary, adding a pinch more salt or pepper if needed. Serve your delicious calabacitas hot. It’s wonderful as a side dish with grilled meats or chicken, or as a vegetarian main course served with warm tortillas. Enjoy the taste of summer!
Conclusion:
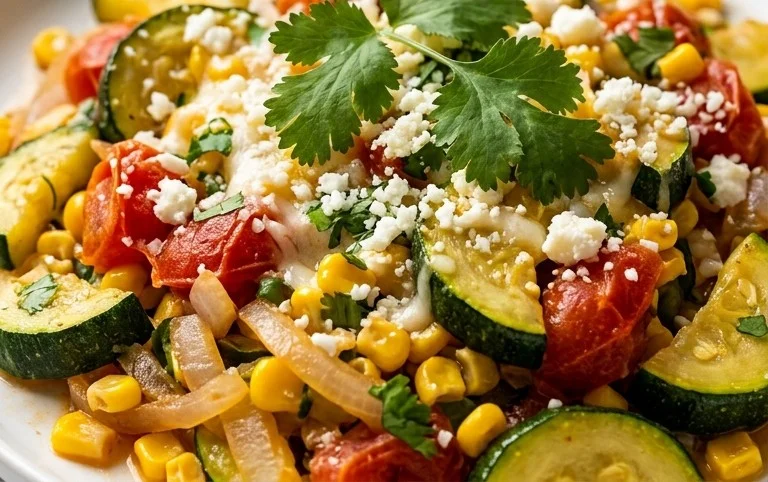
I hope you’ve enjoyed learning about this delightful Calabacitas recipe! It’s truly a wonderful way to capture the fresh, vibrant flavors of summer vegetables. The beauty of this dish lies in its simplicity and versatility. It’s quick to prepare, making it perfect for a weeknight meal, yet flavorful enough to impress guests at a gathering. The tender zucchini and corn, mingled with savory aromatics, create a harmonious and satisfying side dish or even a light main course.
We’ve discussed several serving suggestions, from pairing it with grilled meats and fish to enjoying it as a filling for tacos or enchiladas. Don’t hesitate to get creative with variations! You can add a pinch of chili powder for a touch of heat, some crum extractbled cotija cheese for a salty kick, or even some diced bell peppers for added color and crunch. The fundamental recipe for Calabacitas is a fantastic foundation, and I encourage you to make it your own. So, gather your ingredients and give it a try – you won’t be disappointed!
Frequently Asked Questions about Calabacitas:
What are Calabacitas made of?
The core ingredients for traditional Calabacitas are young zucchini (often called calabacitas), corn kernels (fresh or frozen), onion, garlic, and often tomatoes. Seasonings like salt, pepper, and sometimes a pinch of chili powder are also common.
Can I make Calabacitas ahead of time?
Yes, you can prepare Calabacitas a few hours in advance. However, it’s best enjoyed fresh as the vegetables retain their optimal texture. If making ahead, reheat gently on the stovetop, being careful not to overcook the zucchini.
What is the best type of zucchini to use for Calabacitas?
Look for young, tender zucchini with smooth skin and no visible seeds. These are often labeled as “calabacitas” or “baby zucchini” in grocery stores. Older, larger zucchini can be used, but you’ll want to remove the seeds and a bit more of the watery core to prevent the dish from becoming mushy.
Calabacitas
A classic Mexican sautéed zucchini and corn dish, perfect as a side or light main.
Ingredients
-
1 tablespoon olive oil
-
1 small onion, diced (yellow or white)
-
1 poblano pepper, diced
-
1 jalapeño pepper, diced (seeds removed if you don’t want it spicy)
-
1 ½ cups yellow corn, fresh or frozen (or 15.25-ounce can, drained)
-
2 Roma tomatoes, diced
-
1 large zucchini, sliced into ¼-inch thick quartered pieces or half moons
-
1 large yellow squash, sliced into ¼-inch thick quartered pieces or half moons
-
3 cloves garlic, minced
-
2 teaspoons kosher salt
-
¼ teaspoon freshly ground black pepper
-
¼ teaspoon dried oregano
-
¼ teaspoon ground cumin
-
¼ cup water
-
½ cup shredded cheddar cheese
Instructions
-
Step 1
Heat olive oil in a large skillet or Dutch oven over medium heat. Add the diced onion and cook until softened, about 5 minutes. -
Step 2
Add the diced poblano pepper and jalapeño pepper to the skillet. Cook for another 5-7 minutes, until the peppers begin to soften. -
Step 3
Stir in the yellow corn, diced tomatoes, zucchini, and yellow squash. Continue to cook, stirring occasionally, until the squash and zucchini are tender-crisp, about 8-10 minutes. -
Step 4
Add the minced garlic, kosher salt, black pepper, dried oregano, and ground cumin. Stir well to combine. -
Step 5
Pour in the water and bring to a simmer. Cover and cook for 5 minutes, allowing the flavors to meld. -
Step 6
Uncover the skillet, stir, and remove from heat. Sprinkle the shredded cheddar cheese over the top and let it melt for a minute before serving.
Important Information
Nutrition Facts (Per Serving)
It is important to consider this information as approximate and not to use it as definitive health advice.
Allergy Information
Please check ingredients for potential allergens and consult a health professional if in doubt.