Easy Cereal Bars- Quick & Delicious Homemade Treat
Cereal bars are an absolute game-changer when it comes to quick, satisfying snacks. Who doesn’t love the nostalgic crunch of cereal transformed into a portable, perfectly portioned treat? We’ve all been there – staring into the pantry, craving something sweet and easy, and that’s precisely where these magical cereal bars come into their own. They’re the ultimate blank canvas, allowing us to customize flavor profiles and textures to our heart’s content. Whether you’re a fan of classic fruity loops or prefer a more wholesome granola base, these bars offer an incredible versatility that’s hard to beat. They’re not just a snack; they’re a delightful edible hug, perfect for busy mornings, after-school refueling, or even a sneaky afternoon indulgence. What makes them truly special is their ability to be both incredibly simple to make and astonishingly delicious, proving that sometimes the best things in life are the easiest to whip up!
Why You’ll Love These Cereal Bars
Simple Ingredients, Big Flavor
DIY Cereal Bars: Your New Favorite Anytime Snack
Looking for a quick, customizable, and satisfying snack that you can whip up in no time? My homemade cereal bars are the answer! Forget the pre-packaged stuff filled with ingredients you can’t pronounce. These bars are incredibly versatile, allowing you to use your favorite cereals and adjust the sweetness and texture to your exact liking. They’re perfect for breakfast on the go, a post-workout refuel, or a healthy treat to curb those afternoon cravings. Plus, they’re so simple, even a begin extractner can nail them. Let’s get started and create your perfect cereal bar!
Ingredients:
Getting Started: The Foundation
Before we dive into mixing, it’s important to prepare your workspace and your ingredients. Grab a large mixing bowl. This is where all the magic is going to happen. Measure out your cereal carefully. The type of cereal you choose will significantly impact the final texture and flavor of your bars. Crunchy cereals like puffed rice, corn flakes, or even granola will give you a satisfying crunch, while more dense cereals might result in a chewier bar. If you’re using a mix of cereals, that’s perfectly fine too – get creative!
Next, measure out your nut butter and your liquid sweetener. Peanut butter is a classic for a reason, but almond butter, cashew butter, or even sunflower seed butter (for a nut-free option) work beautifully. The choice of liquid sweetener also plays a role. Agave nectar is neutral and lets the other flavors shine, honey adds a distinct floral sweetness, and brown rice syrup provides a milder, less sticky sweetness.
If you’re opting for the optional salt, measure it out now. A touch of salt can really enhance the sweetness and nutty flavors, making your bars more complex and delicious. And for that extra protein boost, have your protein powder ready to go. Unflavored or vanilla protein powder are usually the best choices to avoid overwhelming the other flavors.
Phase 1: Combining the Binders
Our first crucial step is to create the sticky, binding mixture that will hold all your delicious cereal together. In a medium-sized, microwave-safe bowl, combine your peanut butter (or chosen nut butter) and your liquid sweetener. If your nut butter is a bit stiff, you can microwave it for about 30 seconds to make it more pliable and easier to stir. Stir these two ingredients together until they are well combined and smooth. This mixture will act as the glue for your cereal bars.
If you’re using protein powder and/or salt, this is the ideal time to incorporate them into the wet ingredients. Whisk them in thoroughly. Make sure there are no clumps of protein powder. The goal is a smooth, cohesive mixture. This step is vital for ensuring an even distribution of flavor and texture throughout the bars. Don’t rush this part; a good blend here will make the rest of the process much smoother and result in a more consistent final product.
Phase 2: The Big Mix
Now it’s time for the main event: combining the dry and wet ingredients. Pour your prepared peanut butter and sweetener mixture over the 3 cups of cereal in your large mixing bowl. Using a sturdy spatula or your hands (get ready for a bit of stickiness!), gently fold and mix the ingredients together. The key here is to coat every single piece of cereal with the binding mixture. You want to ensure that each crunchy bite is infused with that delicious peanut butter and sweetener flavor. Be thorough but gentle; you don’t want to crush the cereal too much, especially if you’re aiming for a crunchy bar. Keep mixing until you see no dry pockets of cereal and everything is evenly coated. This might take a few minutes, so be patient. The mixture will become quite thick and clumpy.
Phase 3: Pressing for Perfection
Once your cereal is thoroughly coated, it’s time to press it into your pan. Line an 8×8 inch baking pan with parchment paper, leaving some overhang on the sides. This will make it incredibly easy to lift the entire block of cereal bars out of the pan later. Transfer your cereal mixture into the prepared pan. Now comes the pressing! This is arguably the most important step for achieving well-formed, non-crum extractbly bars. Use a spatula, the bottom of a glass, or even your hands (lightly greased with a little oil or cooking spray to prevent sticking) to firmly press the mixture into an even layer. The firmer you press, the more compact and sturdy your bars will be. Really get in there and pack it down tightly, especially around the edges. A dense press will prevent your bars from falling apart when you cut them.
Phase 4: Setting and Chilling
Once your cereal mixture is tightly packed into the pan, it’s time to let it set. Cover the pan tightly with plastic wrap or aluminum foil. Place the pan in the refrigerator and let it chill for at least 2 hours, or ideally longer. This chilling period is crucial for allowing the nut butter and sweetener to firm up, which will help your bars hold their shape. The colder they get, the easier they will be to cut and the more they will resemble traditional granola bars. You can even leave them in the fridge overnight for maximum firmness.
Phase 5: Cutting and Enjoying
After the chilling period, remove the pan from the refrigerator. Use the parchment paper overhang to carefully lift the entire block of cereal mixture out of the pan and onto a clean cutting board. Now, using a sharp knife, cut the block into your desired bar size. I usually aim for about 12 bars, but you can make them larger or smaller depending on your preference. If the mixture is very firm, you might find it helpful to warm your knife slightly under hot water and dry it before each cut to ensure clean slices.
Once cut, your delicious homemade cereal bars are ready to be enjoyed! Store any leftovers in an airtight container at room temperature for up to 3-4 days, or in the refrigerator for a week. They’re a fantastic, guilt-free snack that you can feel good about making and eating. Enjoy your customizable, homemade goodness!
Conclusion:
So there you have it! These homemade cereal bars are an absolute game-changer. They’re incredibly simple to whip up, requiring minimal effort for maximum deliciousness. Unlike store-bought options, you control the ingredients, making them a healthier and more satisfying treat. Whether you’re packing them for a quick breakfast on the go, a satisfying afternoon snack, or a post-workout energy boost, these cereal bars are sure to hit the spot. Their versatility is truly their superpower!
For serving suggestions, enjoy them plain, or elevate them by drizzling with melted chocolate, a dollop of yogurt, or a sprinkle of your favorite toppings like chopped nuts or dried fruit. Get creative with variations too! Swap out your favorite breakfast cereal for different flavors and textures. Add in some mini chocolate chips, dried cranberries, or even a handful of chia seeds for an extra nutritional punch. The possibilities are endless! I truly encourage you to give this cereal bar recipe a try. You won’t be disappointed!
Frequently Asked Questions:
How can I make my cereal bars chewier?
To achieve a chewier texture, you can slightly increase the amount of your binder (like honey or syrup) or add a touch more nut butter. Ensure you don’t overbake them, as this can lead to a crunchier bar. Pressing them firmly into the pan also helps them bind together well, contributing to a chewier consistency.
Can I make these cereal bars vegan?
Absolutely! To make these cereal bars vegan, you can substitute the honey with maple syrup or agave nectar. Ensure your chosen cereal is also vegan, as some cereals contain non-vegan ingredients. Using a plant-based butter or oil will also be necessary if your recipe calls for butter.
How long do these cereal bars last?
When stored properly in an airtight container at room temperature, these homemade cereal bars will typically last for up to a week. For longer storage, you can refrigerate them, which can extend their shelf life to about two weeks. They also freeze well for up to three months if you want to make a larger batch.
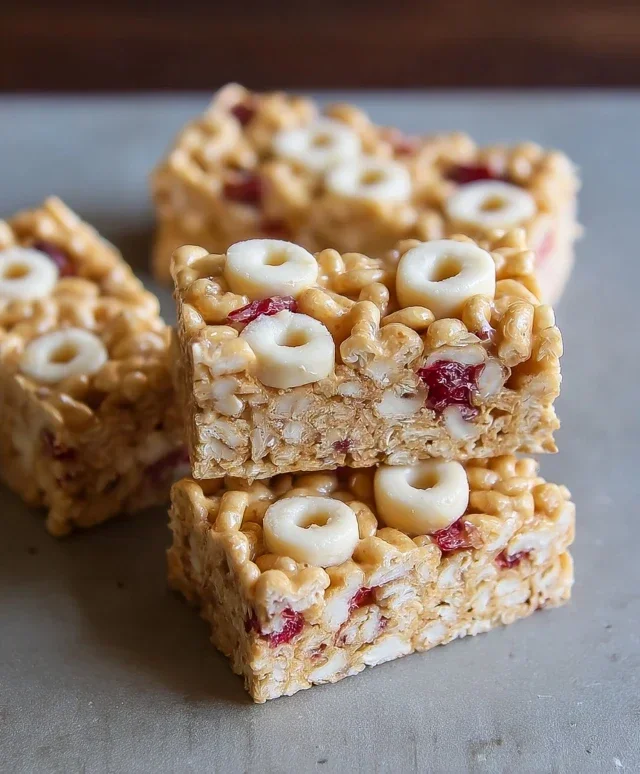
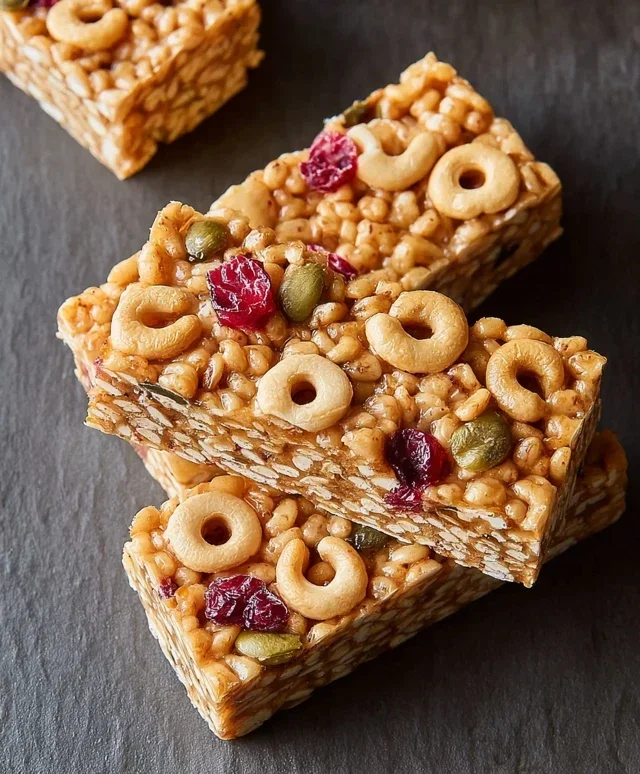
Simple Cereal Bars
Easy-to-make no-bake cereal bars perfect for a quick snack or breakfast on the go. Customizable with your favorite cereal and nut butter.
Ingredients
-
3 cups cereal of choice
-
2/3 cup peanut butter or nut butter of choice
-
1/2 cup agave, honey, or brown rice syrup
-
1/2 tsp salt (optional)
-
3 tbsp protein powder (optional)
Instructions
-
Step 1
Line an 8×8 inch baking pan with parchment paper, leaving some overhang for easy removal. -
Step 2
In a large bowl, combine your cereal of choice. -
Step 3
In a microwave-safe bowl, gently warm the peanut butter or nut butter and agave, honey, or brown rice syrup until smooth and pourable. Stir in the salt and protein powder, if using. -
Step 4
Pour the warm liquid mixture over the cereal and stir until all the cereal is evenly coated. -
Step 5
Transfer the coated cereal mixture into the prepared baking pan and press down firmly and evenly with the back of a spoon or spatula. -
Step 6
Refrigerate for at least 1 hour, or until firm. -
Step 7
Once firm, lift the bars out of the pan using the parchment paper overhang. Cut into desired bar shapes.
Important Information
Nutrition Facts (Per Serving)
It is important to consider this information as approximate and not to use it as definitive health advice.
Allergy Information
Please check ingredients for potential allergens and consult a health professional if in doubt.