Small-Batch Black Forest Brownies-Decadent & Easy
Small-Batch Black Forest Brownies are about to become your new obsession. If you’ve ever swooned over the classic Black Forest cake – that non-intoxicating blend of dark chocolate, tart cherries, and ethereal whipped cream – prepare yourself. These are not your average brownies; they’re an elegant, intensely flavored tribute packed into a perfectly portioned treat. What makes this particular iteration so special is the concentrated essence of that beloved dessert, distilled into a dense, fudgy brownie. We’re talking rich, decadent chocolate studded with juicy cherries and kissed with a hint of kirsch extract (optional, but highly recommended!). Forget the fuss of a layered cake; with these small-batch delights, you can experience all the glorious flavors of a Black Forest indulgence in a far more approachable, and dare I say, even more satisfying, form. Get ready to bake up pure bliss!
Small-Batch Black Forest Brownies
There’s something undeniably decadent about a Black Forest cake – the rich chocolate, the tart cherries, and the airy whipped cream. But who has the time (or the need!) for a whole cake? That’s where these small-batch Black Forest Brownies come in. They capture all the iconic flavors of the classic dessert in a perfectly portioned, incredibly fudgy brownie. These are ideal for a treat for two, a small gathering, or when that intense chocolate craving hits and you want something truly special without the fuss. We’ve kept the ingredient list manageable, ensuring you can whip these up without a trip to the specialty store. Get ready for a taste of pure bliss!
Ingredients:
Instructions:
Preheat and Prepare Your Pan
Before we dive into the deliciousness, let’s get our baking setup ready. Preheat your oven to 350°F (175°C). Since we’re making a small batch, an 8×8 inch baking pan is perfect. Lightly grease the pan with butter or cooking spray, and then line it with parchment paper, leaving some overhang on the sides. This overhang will act as “handles” to easily lift the brownies out of the pan once they’re cooled, making for a much cleaner release and easier slicing. Don’t skip this step; it’s a small thing that makes a big difference in the final presentation!
Melt the Butter and Sugar
In a medium heatproof bowl, combine the ¼ cup of unsalted butter and ½ cup of granulated sugar. You can do this either in the microwave in 30-second intervals, stirring in between, until the butter is completely melted and the sugar is mostly dissolved, or you can melt it gently over a double boiler on the stovetop. The goal here is a smooth, glossy mixture. Once melted, let it cool slightly for a minute or two. This prevents the heat from scrambling our egg in the next step. Whisking the sugar into the warm butter helps it dissolve better, contributing to a fudgier brownie texture.
Incorporate Wet Ingredients and Dry Ingredients
To the slightly cooled butter and sugar mixture, add the 1 large egg and ½ tsp of vanilla extract. Whisk vigorously until everything is well combined and the mixture becomes smooth and slightly lighter in color. Now, it’s time for the dry ingredients. In a separate small bowl, whisk together the ¼ cup of cocoa powder, ¼ cup of all-purpose flour, and ⅛ tsp of salt. Sifting these dry ingredients can help prevent lumps, though for such a small amount, vigorous whisking should suffice. Gradually add the dry ingredients to the wet ingredients, mixing until just combined. Be careful not to overmix at this stage, as overmixing can lead to tough brownies. A few streaks of flour are okay, as they will disappear when you fold in the cherries.
Add the Cherries and Bake
Now for the star of the Black Forest show! Gently fold in the ½ cup of drained canned or jarred cherries. Try to distribute them evenly throughout the batter. Reserve the juice from the can – we’ll use some of that! Pour the brownie batter into your prepared baking pan, spreading it out evenly with a spatula. Place the pan in your preheated oven and bake for approximately 20-25 minutes. The baking time will vary depending on your oven, so keep an eye on them. You’re looking for the edges to be set and a toothpick inserted into the center to come out with moist crum extractbs, not wet batter. Overbaking will result in dry brownies, and we definitely don’t want that. The cherry juice is also key here, as it infuses a subtle fruity essence directly into the brownie base.
Cool, Glaze, and Decorate
Once baked, remove the brownies from the oven and let them cool completely in the pan on a wire rack. This is crucial for achieving that perfect fudgy texture. Once cooled, use the parchment paper overhang to lift the brownie slab out of the pan. In a small bowl, whisk together the 2 tbsp of reserved cherry juice with a tablespoon or two of your ½ cup of whipped cream. You want a slightly thinned but still creamy consistency that can be drizzled. Generously drizzle this cherry-kissed cream over the cooled brownies. For an extra touch of elegance and flavor, sprinkle with chocolate shavings, if desired. Slice into small squares and enjoy the delightful taste of Black Forest cake in brownie form. The contrast between the rich brownie, the tart cherries, and the light, sweet cream is simply divine!
Conclusion:
There you have it – the ultimate guide to creating decadent, small-batch Black Forest Brownies! These aren’t just any brownies; they’re a perfect marriage of rich chocolate, tart cherries, and a whisper of kirsch extract, all in a convenient, manageable size. This recipe is fantastic because it delivers intense flavor without overwhelming your kitchen or leaving you with too many leftovers (though honestly, who minds leftovers of these?). The balance of textures, from the fudgy brownie base to the bursts of cherry, is simply divine. They’re ideal for a special treat, a thoughtful gift, or simply when a chocolate craving strikes and you need a sophisticated solution.
I love serving these alongside a scoop of vanilla bean ice cream for an extra layer of indulgence, or with a dollop of freshly whipped cream for a lighter touch. For variations, don’t hesitate to experiment! You could try adding a splash of almond extract to the batter, or substituting raspberries for the cherries for a different berry profile. Even a sprinkle of chocolate shavings on top before baking adds an extra visual appeal. I truly encourage you to give these small-batch Black Forest Brownies a try. You won’t be disappointed!
Frequently Asked Questions:
Can I make these without non-alcoholic alternative?
Absolutely! If you prefer to omit the kirsch extract, you can replace it with an equal amount of cherry juice or even a tablespoon of vanilla extract. The flavor will be slightly different, but still delicious.
How long do these brownies keep?
Stored in an airtight container at room temperature, these brownies will stay fresh for about 3-4 days. For longer storage, you can refrigerate them for up to a week, or freeze them for up to 3 months. Thaw at room temperature before enjoying.
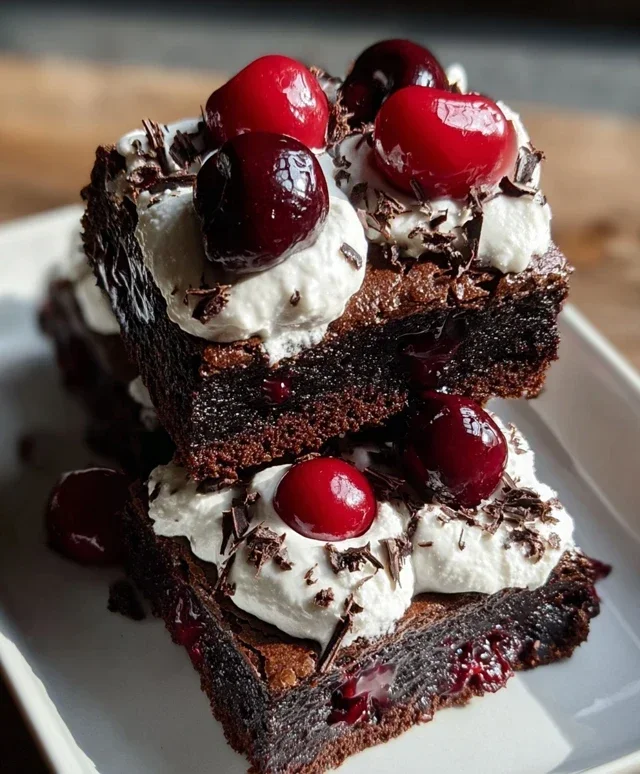
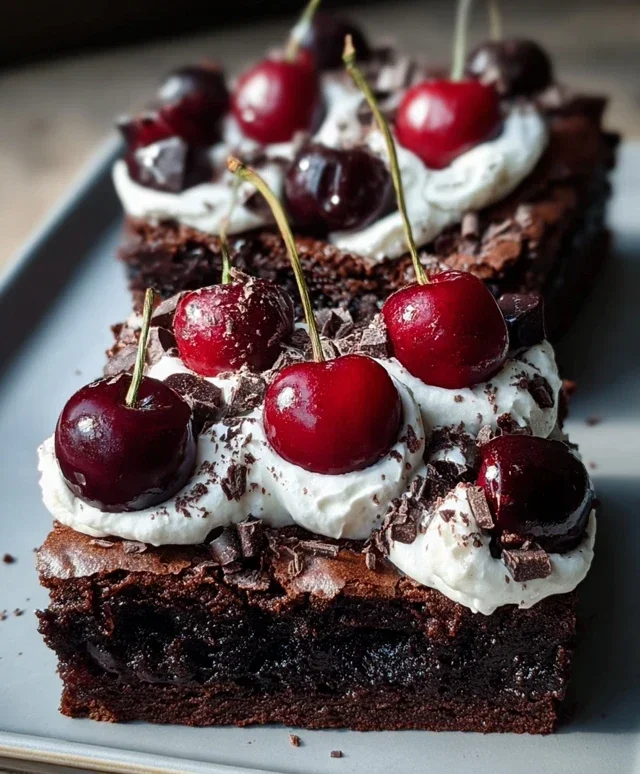
Small-Batch Black Forest Brownies
Decadent, small-batch brownies with classic Black Forest flavors of cherry and chocolate, topped with whipped cream and optional chocolate shavings.
Ingredients
-
¼ cup unsalted butter
-
½ cup granulated sugar
-
1 large egg
-
½ tsp vanilla extract
-
¼ cup cocoa powder
-
¼ cup all-purpose flour
-
⅛ tsp salt
-
½ cup canned or jarred cherries (drained, juice reserved)
-
2 tbsp cherry juice (from can)
-
½ cup whipped cream
-
Chocolate shavings (optional)
Instructions
-
Step 1
Preheat oven to 350°F (175°C). Line an 8×8 inch baking pan with parchment paper. -
Step 2
In a medium bowl, melt the unsalted butter. Stir in the granulated sugar until combined. -
Step 3
Whisk in the large egg and vanilla extract until smooth. -
Step 4
In a separate small bowl, whisk together the cocoa powder, all-purpose flour, and salt. Gradually add the dry ingredients to the wet ingredients, mixing until just combined. Do not overmix. -
Step 5
Fold in the drained cherries and the reserved cherry juice. -
Step 6
Pour the batter into the prepared baking pan and spread evenly. Bake for 20-25 minutes, or until a toothpick inserted into the center comes out with moist crumbs. -
Step 7
Let the brownies cool completely in the pan before cutting. -
Step 8
Once cooled, cut into small squares. Top each brownie with whipped cream and optional chocolate shavings before serving.
Important Information
Nutrition Facts (Per Serving)
It is important to consider this information as approximate and not to use it as definitive health advice.
Allergy Information
Please check ingredients for potential allergens and consult a health professional if in doubt.