Easy Homemade Strawberry Ice Cream Recipe
Homemade Strawberry Ice Cream is more than just a dessert; it’s a vibrant, nostalgic trip back to sun-drenched afternoons and pure, unadulterated joy. Who doesn’t adore the sweet, slightly tart burst of fresh strawberries, transformed into a creamy, dreamy frozen delight? We’ve all experienced that magical moment, spoon delving into a perfect scoop, the cool sweetness melting on the tongue. But there’s something truly special about crafting your own Homemade Strawberry Ice Cream. It’s about harnessing the peak season’s bounty, coaxing out the deepest, most natural strawberry flavor without any artificial interference. This recipe celebrates the simple perfection of real fruit, creating a taste that’s miles beyond anything you’ll find pre-packaged. Get ready to churn out a batch of pure, homemade happiness.
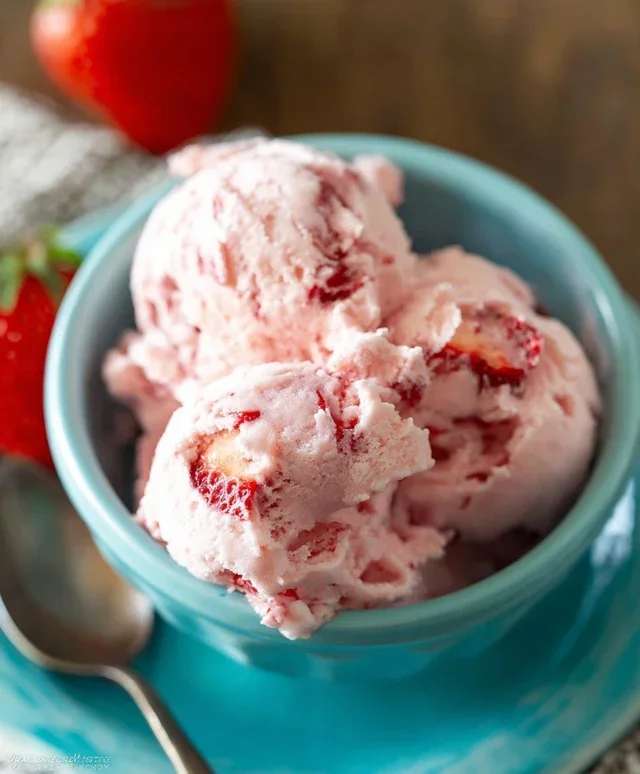
Homemade Strawberry Ice Cream
There’s something undeniably special about homemade ice cream. The creamy texture, the pure, unadulterated flavor, and the sheer satisfaction of creating something so delightful from scratch are hard to beat. And when it comes to classic flavors, few can rival the vibrant, sweet-tart burst of fresh strawberries. This recipe for homemade strawberry ice cream is designed to capture that essence perfectly, using simple, real ingredients for a truly exceptional treat. Forget those store-bought versions that often taste artificial or overly sweet; this recipe will have you indulgin extractg in pure strawberry bliss.
The beauty of this recipe lies in its simplicity. We’re not dealing with complicated custards or tempering eggs. Instead, we’re relying on the natural sweetness of strawberries, a touch of honey for depth, and the perfect balance of cream and half-and-half to achieve that luxuriously smooth texture. The lemon juice is a little secret weapon, enhancing the strawberry flavor and adding a subtle brightness that prevents the ice cream from tasting flat. Get ready to impress yourself and anyone lucky enough to share a scoop (or two!).
Ingredients:
Crafting Your Strawberry Dream
Now for the fun part – turning these beautiful ingredients into a frozen masterpiece! The process is straightforward and incredibly rewarding.
Prepare the Strawberry Puree:
In a medium bowl, combine the hulled and diced strawberries with the 2 tablespoons of honey, 1/2 cup of granulated sugar, and 1 teaspoon of lemon juice. Gently stir everything together to ensure the strawberries are coated. Let this mixture sit for at least 15-20 minutes. This resting period is crucial as it allows the sugar and honey to start drawing out the natural juices from the strawberries. You’ll notice the strawberries begin extract to soften and release their vibrant color and flavor. After resting, I like to give it a gentle mash with a fork or potato masher. You don’t need to completely pulverize them; some small chunks of strawberry are wonderful to find in the finished ice cream, providing little bursts of texture and intense flavor. If you prefer a completely smooth ice cream, you can transfer this mixture to a blender or food processor and pulse until you reach your desired consistency. The lemon juice at this stage is key – it brightens the berry flavor, making it pop, and balances the sweetness from the honey and sugar.
Whip the Cream Mixture:
In a separate large bowl, pour in the 1 cup of heavy whipping cream and the 1/2 cup of half-and-half. Add the 1 teaspoon of vanilla extract. Using an electric mixer (handheld or stand mixer with whisk attachment), begin extract to whip the cream mixture. Start on a low speed and gradually increase to medium-high. We are not aiming for stiff peaks here, like you would for whipped cream for topping. Instead, we want to whip it until it’s slightly thickened and holds soft peaks. This means when you lift the whisk, the cream will form a peak that gently curls over. Over-whipping at this stage can lead to a grainy texture in your ice cream, so be mindful of this. The goal is to aerate the cream just enough to give the ice cream a lighter, airier texture without making it heavy. The vanilla extract adds its classic comforting aroma and flavor, which complements the strawberries beautifully.
Combine and Chill:
Now it’s time to bring our strawberry and cream components together. Gently fold the prepared strawberry mixture (including any juices that have accumulated) into the whipped cream mixture. Be careful not to overmix. You want to incorporate the strawberries evenly without deflating the whipped cream too much. The goal is to create a beautifully swirled, pnon-alcoholic ale pink base. Once combined, cover the bowl tightly with plastic wrap and refrigerate for at least 2 hours, or ideally, until thoroughly chilled. This chilling step is vital before churning. A cold base churns more effectively and quickly, leading to smaller ice crystals and a smoother final product. If your base isn’t cold enough, your ice cream maker will have a harder time freezing it, resulting in a less desirable texture.
Churn the Ice Cream:
Once your ice cream base is well-chilled, it’s time to churn! Pour the cold mixture into your ice cream maker according to the manufacturer’s instructions. Churn for about 20-30 minutes, or until the ice cream reaches a soft-serve consistency. During the churning process, the ice cream maker incorporates air while freezing the mixture, which is what creates that characteristic smooth and creamy texture of ice cream. Resist the urge to over-churn, as this can also lead to a harder ice cream. You’ll see the mixture gradually thicken and transform into a lovely, soft ice cream.
Freeze to Firmness:
At this point, your ice cream will likely be the consistency of soft-serve. While delicious on its own, it needs a bit more time to firm up into scoopable ice cream. Transfer the churned ice cream to an airtight container. Press a piece of parchment paper or plastic wrap directly onto the surface of the ice cream to prevent ice crystals from forming on top. Seal the container tightly. Place the container in the freezer for at least 4-6 hours, or until the ice cream is firm enough to scoop. The longer it freezes, the firmer it will become. For the best scooping experience, I often let it sit at room temperature for a few minutes before serving. Enjoy your incredibly fresh and delicious homemade strawberry ice cream!
Conclusion:
Congratulations! You’ve just learned how to create luscious, homemade strawberry ice cream from scratch, and trust me, it’s an experience unlike any store-bought treat. This recipe is fantastic because it allows you to control the quality of your ingredients, resulting in a vibrant, fresh strawberry flavor that’s bursting with natural sweetness. The creamy texture is simply divine, and the satisfaction of serving a dessert you made with your own hands is unparalleled. It’s a perfect way to celebrate summer, enjoy a special occasion, or simply indulge in a delightful dessert.
I highly recommend serving this glorious homemade strawberry ice cream with a drizzle of fresh strawberry sauce, a sprinkle of toasted almonds, or even alongside a warm slice of pound cake for an extra decadent touch. Don’t be afraid to get creative with variations! Consider adding a swirl of chocolate or a handful of fresh basil for an unexpected twist. The possibilities are endless, and I encourage you to dive in and give this recipe a try. You won’t regret experiencing the pure joy of homemade ice cream.
Frequently Asked Questions:
Can I make this without an ice cream maker?
Absolutely! While an ice cream maker yields the smoothest texture, you can achieve a delicious result without one. Prepare the base as directed, then pour it into a shallow freezer-safe container. Freeze for about 45 minutes, then scrape down the sides and break up any ice crystals with a fork. Repeat this process every 30-45 minutes for 2-3 hours until it reaches your desired consistency. It will be a bit icier than churned, but still incredibly flavorful!
My strawberries aren’t very sweet. How can I adjust?
If your strawberries are a bit tart, you can easily adjust the sweetness. Start with the amount of sugar called for in the recipe. After blending and tasting the mixture before chilling, add more sugar, a tablespoon at a time, until it reaches your preferred sweetness. Remember that the cold will slightly mute the sweetness, so aim for a taste that’s just a touch sweeter than you’d normally prefer.
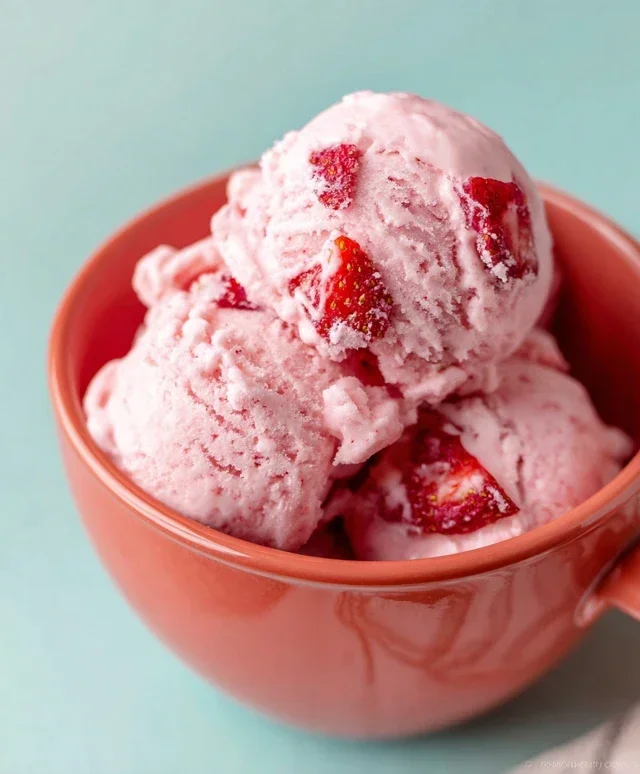
Homemade Strawberry Ice Cream
A simple and delicious homemade strawberry ice cream recipe using fresh ingredients.
Ingredients
-
1 1/2 cups strawberries, hulled and diced
-
2 Tbsp honey
-
1/2 cup granulated sugar
-
1 tsp lemon juice
-
1 cup heavy whipping cream
-
1/2 cup half and half
-
1 tsp vanilla extract
Instructions
-
Step 1
In a bowl, combine the hulled and diced strawberries with honey, granulated sugar, and lemon juice. Let sit for 30 minutes to macerate. -
Step 2
Transfer the macerated strawberries to a blender or food processor and puree until smooth. Strain through a fine-mesh sieve to remove seeds, if desired, and set aside. -
Step 3
In a separate bowl, whisk together the heavy whipping cream, half and half, and vanilla extract until well combined. -
Step 4
Gradually whisk the strawberry puree into the cream mixture until fully incorporated. -
Step 5
Chill the mixture thoroughly in the refrigerator for at least 2 hours, or until very cold. -
Step 6
Pour the chilled mixture into an ice cream maker and churn according to the manufacturer’s instructions until it reaches a soft-serve consistency. -
Step 7
Transfer the ice cream to an airtight container and freeze for at least 4 hours, or until firm.
Important Information
Nutrition Facts (Per Serving)
It is important to consider this information as approximate and not to use it as definitive health advice.
Allergy Information
Please check ingredients for potential allergens and consult a health professional if in doubt.