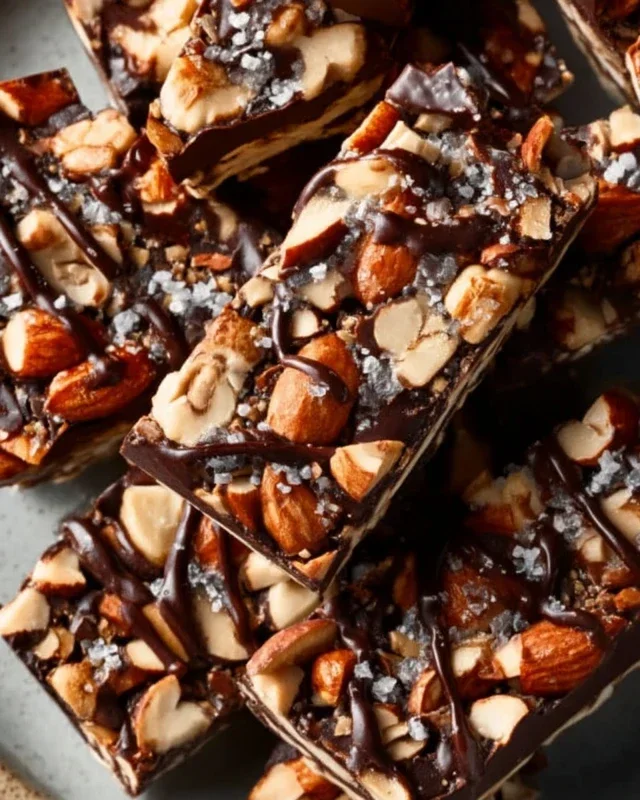
Salted Brownie Cookies-Rich Chewy Chocolate Bliss
Salted Brownie Cookies: the ultimate indulgence that I’ve been perfecting in my kitchen, and I’m so excited to share them with you! If you’re anything like me, you crave that perfect balance of rich, fudgy brownie and a delightful chewy cookie. Well, these salted brownie cookies deliver exactly that, and then some. What is it about this magical combination that makes us weak at the knees? It’s the sheer, unadulterated comfort. The deep, dark chocolate flavor is intensely satisfying, reminiscent of your favorite childhood brownies, but with that irresistible cookie chew that makes them perfect for dunking or simply devouring. The sprinkle of flaky sea salt on top isn’t just a flourish; it’s a flavor game-changer, cutting through the sweetness and amplifying every chocolatey note. Get ready to fall head over heels for these irresistible treats.
Why You’ll Adore These Salted Brownie Cookies
The Perfect Texture, The Ultimate Flavor

Salted Brownie Cookies
There’s something undeniably magical about a brownie. That deep, rich chocolate flavor, the chewy interior, the slightly crisp edge – it’s pure comfort in every bite. But what if I told you we could take that brownie bliss and transform it into an infinitely more shareable, delightfully dippable, and utterly irresistible cookie form? Enter the Salted Brownie Cookie. These aren’t just chocolate cookies with a hint of brownie. Oh no, these are brownies that have been meticulously engin extracteered into cookie form, boasting an intensely fudgy texture and a profound chocolate punch, all crowned with a sprinkle of flaky sea salt to elevate every single element.
The beauty of these cookies lies in their duality. They offer the satisfying chew of a classic brownie while delivering the easy portability and charming presentation of a cookie. The subtle addition of espresso powder, if you choose to use it, deepens the chocolate flavor without making the cookies taste like coffee – it’s a secret weapon for unlocking maximum cocoa potential. And that sprinkle of sea salt? It’s not just for show; it’s a flavor enhancer that cuts through the sweetness and makes the chocolate sing. Get ready to impress your friends, family, or just treat yourself to a truly magnificent cookie experience.
Ingredients:
Crafting the Perfect Brownie Cookie Dough
The foundation of any great cookie is a well-made dough, and for these brownie cookies, we’re aiming for richness and depth from the very begin extractning.
1. Melt the Chocolate and Butter Base: In a heatproof bowl set over a saucepan of simmering water (a double boiler setup), combine the 6 tablespoons of unsalted butter and 1 cup of semi-sweet chocolate chips. Stir occasionally until the butter is completely melted and the chocolate is smooth and glossy. This gentle melting process ensures the chocolate doesn’t scorch, preserving its delicate flavor. Once melted and smooth, remove the bowl from the heat and set it aside to cool slightly. This slightly cooled chocolate mixture is the heart of our brownie cookie’s fudgy texture. While it’s cooling, whisk in the 1/4 cup of uns unsweetened cocoa powder and the optional 1 tsp of espresso powder until no lumps remain. This step blooms the cocoa, intensifying its chocolatey essence.
2. Combine Wet Ingredients: In a separate large bowl, whisk together the 2 large eggs (which should be at room temperature, as this helps them emulsify better with the other ingredients), the 1 large egg yolk (also at room temperature), and the 1 cup of granulated sugar. Whisk vigorously until the mixture is pnon-alcoholic ale and slightly thickened, which usually takes about 2-3 minutes. This aeration is crucial for a good cookie structure. Next, whisk in the 1 tablespoon of vegetable oil and 1 teaspoon of vanilla extract until well combined. The oil contributes to the chegrape juicess, while the vanilla adds a warm aroma and flavor.
3. Marrying the Chocolate and Sugar Mixtures: Now it’s time to bring our cooled chocolate mixture into the egg and sugar mixture. Gradually pour the slightly cooled, chocolate-cocoa mixture into the egg and sugar mixture while whisking constantly. Continue to whisk until everything is thoroughly combined and you have a glossy, homogenous batter. This is where the magic starts to happen, and you’ll notice the batter taking on a beautiful, deep chocolate hue.
4. Incorporating Dry Ingredients: In a small bowl, whisk together the 1 cup of all-purpose flour, 1 teaspoon of baking powder, and 1/8 teaspoon of salt. Sifting these dry ingredients is a good practice to ensure even distribution and prevent any clumps. Add the dry ingredients to the wet ingredients in two additions, mixing on low speed or by hand with a spatula until just combined. Be careful not to overmix. Overmixing develops the gluten in the flour too much, which can result in tough cookies. We want tender, fudgy cookies, so just mix until you no longer see streaks of flour. Fold in the remaining 1 cup of semi-sweet chocolate chips, distributing them evenly throughout the dough.
Baking the Brownie Cookies to Perfection
The baking stage is where our carefully crafted dough transforms into irresistible cookies.
5. Scooping and Topping: Preheat your oven to 350 degrees Fahrenheit (175 degrees Celsius). Line baking sheets with parchment paper to prevent sticking and ensure even heat distribution. Drop rounded tablespoons of dough onto the prepared baking sheets, leaving about 2 inches between each cookie to allow for spreading. For that signature brownie-like texture, it’s important not to flatten these cookie dough balls too much; their slightly mounded shape will encourage a fudgier interior. If you desire extra chocolatey goodness, gently press a few extra semi-sweet chocolate chips into the tops of each cookie before baking.
6. Baking and Salting: Bake for 10-12 minutes, or until the edges are set and slightly puffed, but the centers still look slightly underbaked and glossy. This is the key to a fudgy brownie cookie! Overbaking will lead to a dry, cakey cookie, which is not what we’re after. As soon as the cookies come out of the oven, and while they are still hot and soft, generously sprinkle them with sea salt flakes. The heat of the cookies will help the salt adhere beautifully. If you’re using sea salt flakes, this is also the time to sprinkle them. Let the cookies cool on the baking sheet for about 5-10 minutes before transferring them to a wire rack to cool completely. They will continue to set up as they cool, achieving that perfect chewy, fudgy texture.
These Salted Brownie Cookies are a true indulgence. They’re perfect for a mid-afternoon treat, a delightful accompaniment to your morning coffee, or a show-stopping addition to any dessert table. Enjoy every rich, chewy, chocolatey bite!

Conclusion:
I hope you’ve enjoyed diving into this delightful recipe for Salted Brownie Cookies! These aren’t just any cookies; they’re a perfect symphony of rich, fudgy brownie goodness and a hint of sea salt that elevates every bite. The beauty of this recipe lies in its simplicity and the incredible payoff in flavor and texture. Whether you’re a seasoned baker or just starting out, these cookies are sure to impress, offering that satisfying chewy center with slightly crisp edges that we all crave. They’re the ultimate treat for any occasion, from a casual afternoon snack to a decadent dessert that will disappear in minutes.
For serving, I love them warm, fresh from the oven, perhaps with a glass of cold milk or a scoop of vanilla ice cream for an extra special indulgence. They also make fantastic gifts – package them up in a nice tin for a truly thoughtful present. If you’re feeling adventurous, consider adding a sprinkle of flaky sea salt immediately after baking for an even more pronounced salty-sweet contrast, or even a few chocolate chips for extra melty pockets. I truly encourage you to give these Salted Brownie Cookies a try; they are a game-changer!
Frequently Asked Questions:
Can I make these cookies ahead of time?
Absolutely! You can store the baked Salted Brownie Cookies in an airtight container at room temperature for up to 3-4 days. They tend to maintain their chegrape juicess quite well. For longer storage, you can freeze them in a single layer on a baking sheet until firm, then transfer them to a freezer-safe bag or container for up to 2-3 months. Thaw them at room temperature or gently warm them in the oven for a few minutes to recapture that fresh-baked magic.
What kind of chocolate should I use?
For the best brownie-like flavor, I recommend using good quality semi-sweet or dark chocolate chips or a chopped chocolate bar. The richer the chocolate, the deeper your brownie flavor will be. Avoid milk chocolate as it can make the cookies too sweet and may not provide the same intense chocolatey depth.
How do I get that perfect crackly top?
The crackly top is a signature of a great brownie, and it translates beautifully to these cookies! Ensuring your butter and sugar are properly creamed, not overmixing your dough, and baking at the correct temperature are key. The gentle spread of the cookie as it bakes, combined with the moisture release, helps create those desirable fissures. Don’t be afraid of a slight puff and then a settling; that’s usually a good sign!
Salted Brownie Cookies
Chewy brownie cookies with a rich chocolate flavor and a hint of sea salt.
Ingredients
-
1 cup All-Purpose Flour
-
1 tsp Baking Powder
-
1/8 tsp Salt
-
2 Large Eggs (room temperature)
-
1 Large Egg Yolk (room temperature)
-
1 cup Granulated Sugar
-
1 tbsp Vegetable Oil
-
1 tsp Vanilla Extract
-
6 tbsp Unsalted Butter
-
1 cup Semi-Sweet Chocolate Chips
-
1/4 cup Unsweetened Cocoa Powder
-
1 tsp Espresso Powder
-
Sea Salt Flakes
Instructions
-
Step 1
Melt the unsalted butter in a medium saucepan over low heat. Remove from heat and stir in the semi-sweet chocolate chips until melted and smooth. Let cool slightly. -
Step 2
In a large bowl, whisk together the granulated sugar, vegetable oil, and vanilla extract. Beat in the room temperature eggs and egg yolk until well combined and slightly lighter in color. -
Step 3
Add the melted chocolate mixture to the wet ingredients and stir until just combined. Stir in the unsweetened cocoa powder and espresso powder (if using) until no streaks remain. -
Step 4
In a separate small bowl, whisk together the all-purpose flour, baking powder, and 1/8 tsp salt. Gradually add the dry ingredients to the wet ingredients, mixing until just combined. Do not overmix. -
Step 5
Cover the dough and refrigerate for at least 2 hours, or until firm enough to scoop. -
Step 6
Preheat your oven to 350°F (175°C). Line baking sheets with parchment paper. -
Step 7
Scoop rounded tablespoons of dough onto the prepared baking sheets, leaving about 2 inches between cookies. Press a few extra chocolate chips onto the tops of the cookies. -
Step 8
Bake for 10-12 minutes, or until the edges are set but the centers are still slightly soft. Sprinkle with sea salt flakes immediately after removing from the oven. -
Step 9
Let the cookies cool on the baking sheets for a few minutes before transferring them to a wire rack to cool completely.
Important Information
Nutrition Facts (Per Serving)
It is important to consider this information as approximate and not to use it as definitive health advice.
Allergy Information
Please check ingredients for potential allergens and consult a health professional if in doubt.